

Why Slow Drainage Is a Red Flag
When water sits on top of the soil or takes a long time to drain, it's a clear signal that something is preventing its flow. This is more than just an inconvenience; it’s a threat to your plant's health. Saturated soil means there are no air pockets,
and roots need oxygen to function. Without it, they can't effectively absorb water or nutrients, leading to a condition called root rot. This is where the roots begin to decay, turning brown and mushy, which can eventually kill the plant. Poor drainage creates an environment where fungal diseases thrive, weakening your plant and making it susceptible to further issues. Understanding the cause is the first step toward saving your plant from a waterlogged fate.
Problem 1: The Plant Is Root-Bound
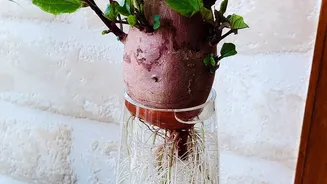
One of the most common reasons for poor drainage is that the plant has simply outgrown its home. A 'root-bound' plant has a dense, tangled mass of roots that have filled the entire pot, displacing the soil. Without enough soil to retain moisture, the tightly wound roots can form a barrier that water struggles to penetrate. Key signs that your plant may be root-bound include: roots growing out of the drainage holes, visible roots on the surface of the soil, stunted or slowed growth, and needing to water far more frequently than you used to. To confirm, you can gently slide the plant out of its pot. If you see more roots than soil, forming a tightly coiled shape, it’s time for a new home.
Solution: How to Repot a Root-Bound Plant
Repotting a root-bound plant gives it the space and fresh soil it needs to thrive. Start by choosing a new pot that is about two inches wider in diameter than the current one. Gently remove the plant from its old container. You may need to squeeze the sides of a flexible pot to loosen it. Once freed, carefully tease and untangle the bottom roots. Don't be afraid to gently break apart the most compacted sections to encourage the roots to grow outwards into the new soil. Place a layer of fresh, well-draining potting mix in the new pot, set the plant in, and fill the surrounding space with more soil, ensuring the plant sits at the same depth it did previously. Water it thoroughly to help the soil settle and eliminate air pockets.
Problem 2: The Soil Is Compacted
If the roots aren't the issue, the soil itself is the likely culprit. Over time, potting soil degrades and compacts. The fine organic materials break down, and repeated watering from the top can cause the soil particles to settle, squeezing out the essential air pockets. This creates a dense, brick-like medium that water can't easily flow through. Old soil can also become hydrophobic, meaning it actively repels water when it gets too dry, making rehydration even more difficult. You might notice that the soil feels hard to the touch or has pulled away from the sides of the pot. In this state, even if the pot has drainage holes, the water can't reach them, suffocating the roots.
Solution: Refreshing or Replacing the Soil
For mildly compacted soil, you can try aeration. Gently poke several holes deep into the soil with a chopstick or a similar thin tool, being careful to avoid major roots. This creates channels for water and air to penetrate the root zone. However, the most effective long-term solution is to replace the old, tired soil. Carefully remove the plant from the pot, shake off as much of the old, compacted soil from the roots as you can, and repot it with a fresh, high-quality potting mix. Look for mixes designed for containers that include ingredients like perlite, pumice, or orchid bark, which create a light, airy structure that resists compaction and promotes excellent drainage.