




The Silent Threat of Dirty Tools
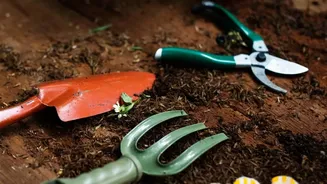
Your gardening tools can act as vectors for disease, transferring microscopic pathogens from one plant to another. Think of a trowel or pruner as a surgical instrument; using it on an infected plant and then on a healthy one without sterilisation is a recipe
for disaster. Plant pathogens like fungi, bacteria, and viruses can cling to soil and sap residue on your tools, waiting to infect the next plant you touch. Diseases such as Fusarium wilt, bacterial canker, and various root rots can spread this way, often without any visible symptoms on the tools themselves. A single cut with a contaminated blade can introduce a devastating infection directly into a plant’s vascular system, bypassing its natural defences. Taking a few moments to clean your equipment is one of the most effective preventative measures a gardener can take.
How to Properly Sterilise Your Equipment
Sterilisation is a simple, two-step process: cleaning, then disinfecting. First, physically remove all visible soil, sap, and plant debris from your tools. A stiff brush and some soapy water are perfect for this task. Dirt and organic matter can reduce the effectiveness of disinfectants, so this initial cleaning is crucial. Once the tool is clean, it's time to disinfect. Several common household products work well. A solution of one part household bleach to nine parts water is effective, but requires a soak of at least 10 minutes and can be corrosive to metal over time. A simpler and less corrosive option is isopropyl (rubbing) alcohol. A concentration of 70% or higher can be wiped or sprayed directly onto the blades and is effective almost immediately, with no rinsing required. Make it a habit to disinfect your tools before each repotting session and especially between plants if you suspect any disease is present.
Why Fresh Potting Mix is Essential
It’s tempting to scoop old soil from one pot into another, but this is a major mistake. Over time, a plant uses up the nutrients in its potting mix. What's left is often a depleted medium that can no longer support vigorous growth. Furthermore, old potting soil can become compacted, making it difficult for roots to access water and air. It can also become hydrophobic, meaning it repels water rather than absorbing it. Starting with a fresh, high-quality potting mix ensures your plant has the nutrients, proper drainage, and aeration it needs to thrive in its new home. Commercial mixes are generally soilless, composed of materials like peat moss, coir, and perlite, which provide a lightweight and sterile environment ideal for container plants.
The Hidden Risks of Reusing Old Soil
Beyond nutrient depletion, old soil poses a significant risk because it can harbour the same invisible enemies as dirty tools. The soil from a plant that previously struggled with pests or disease is likely contaminated. Fungal spores, harmful bacteria, and the eggs of pests like fungus gnats or spider mites can remain dormant in the soil, ready to attack your freshly repotted plant. Even if a previous plant seemed healthy, it may have had a low-level issue that could flourish when introduced to a new, potentially stressed plant. Investing in a new bag of potting mix is a small price to pay for the peace of mind and the insurance it provides against a potential infestation or infection. If you had a plant with a known disease, the old soil should be disposed of in the trash, not in your compost or garden beds, to prevent further spread.
Choosing the Right Mix and Repotting
When you choose a fresh mix, try to match it to your plant's needs. A succulent or cactus requires a fast-draining mix, while a tropical fern prefers a mix that retains more moisture. When it's time to repot, gently remove the plant from its old container. If the plant is healthy, you don't need to remove all of the old soil from the root ball. Loosen any circling roots at the bottom and place it in the new pot, which should be only about 2 inches larger in diameter. Using your clean trowel, fill in the surrounding space with fresh potting mix, lightly packing it down to remove air pockets. Water thoroughly to help the plant settle into its new home. By combining the benefits of a sterile environment and a nutrient-rich foundation, you set the stage for a successful transition and future growth.