





Start with an Interior Check
The most obvious signs of a window leak appear inside your home. Begin by carefully examining the walls, ceiling, and floor around each window. Look for discolored stains, which can be yellow, brown, or gray, indicating water has seeped in and dried.
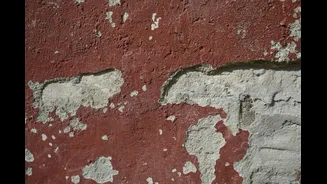
Also, check for any paint that is bubbling, peeling, or blistering, as this happens when moisture gets trapped behind the paint layer. Gently press on the drywall or plaster around the frame; if it feels soft or spongy, it's a clear sign of water saturation. Don't forget to use your nose—a persistent musty or earthy smell often points to hidden mold or mildew growth, even if you can't see it.
Inspect the Window Frame and Sill
Next, focus on the window unit itself. Water pooling on the windowsill is a direct sign of a leak. Check wooden frames and sills for any signs of warping, swelling, or softness, which suggest the wood has absorbed moisture. This can also make windows difficult to open or close. For double-paned or insulated glass units, look for condensation or fogging between the panes of glass. This indicates that the seal has failed, allowing moisture to get in and compromising the window's insulating properties.
Examine the Seals and Weatherstripping
The seals around your windows are a primary defense against rain. Inspect the weatherstripping, which is the flexible seal along the edges of the operable parts of the window. It should be intact and create a snug fit when the window is closed. If it appears cracked, brittle, or compressed, it's likely not sealing properly. Also check the lock; a window that doesn't latch securely might not be fully sealed, leaving a gap for water to enter, especially during wind-driven rain. An air leak test, by simply running your hand around the frame to feel for drafts, can often reveal where a seal is failing.
Move to the Exterior Caulking
Head outside to inspect the exterior perimeter of the window. The caulking, which seals the gap between the window frame and your home's siding or wall, is a common failure point. Over time, sun and weather can cause caulk to dry out, crack, or pull away from the surface. Look closely for any visible gaps or signs of deterioration. Even a small crack can allow a surprising amount of water to get behind the frame and into your walls. This is one of the most frequent causes of window leaks but is also one of the most straightforward to fix by removing the old caulk and applying a new bead.
Check Weep Holes and Drainage
Many modern vinyl and metal windows have small, slit-like openings on the bottom exterior of the frame called 'weep holes'. These are designed to allow any water that gets into the window tracks to drain back outside. Over time, these holes can become clogged with dirt, debris, or insects. When blocked, water can pool inside the window frame and eventually overflow into your home. Use a small wire or a paperclip to gently clear any obstructions from the weep holes to ensure they can function as intended.
Assess Surrounding Walls and Flashing
Finally, look at the area above and around the window. Water stains on the exterior siding could indicate a problem higher up. Crucially, check the flashing, which is a thin strip of waterproof material (usually metal) installed above the window frame. Its job is to direct water from the wall away from the window opening. If the flashing is damaged, improperly installed, or missing, water can run down the wall and get in behind the frame, causing a leak that appears to come from the top of the window. This type of issue is more complex and often requires professional attention.