


A Sweet with Sacred Roots
The Mathura Peda is more than just a dessert; it's a piece of cultural heritage. Originating from Mathura in Uttar Pradesh, the birthplace of Lord Krishna, this sweet has been a part of religious rituals for centuries. Milk-based sweets are central to
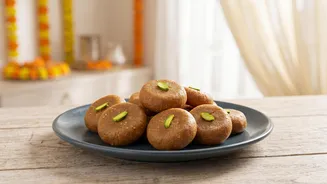
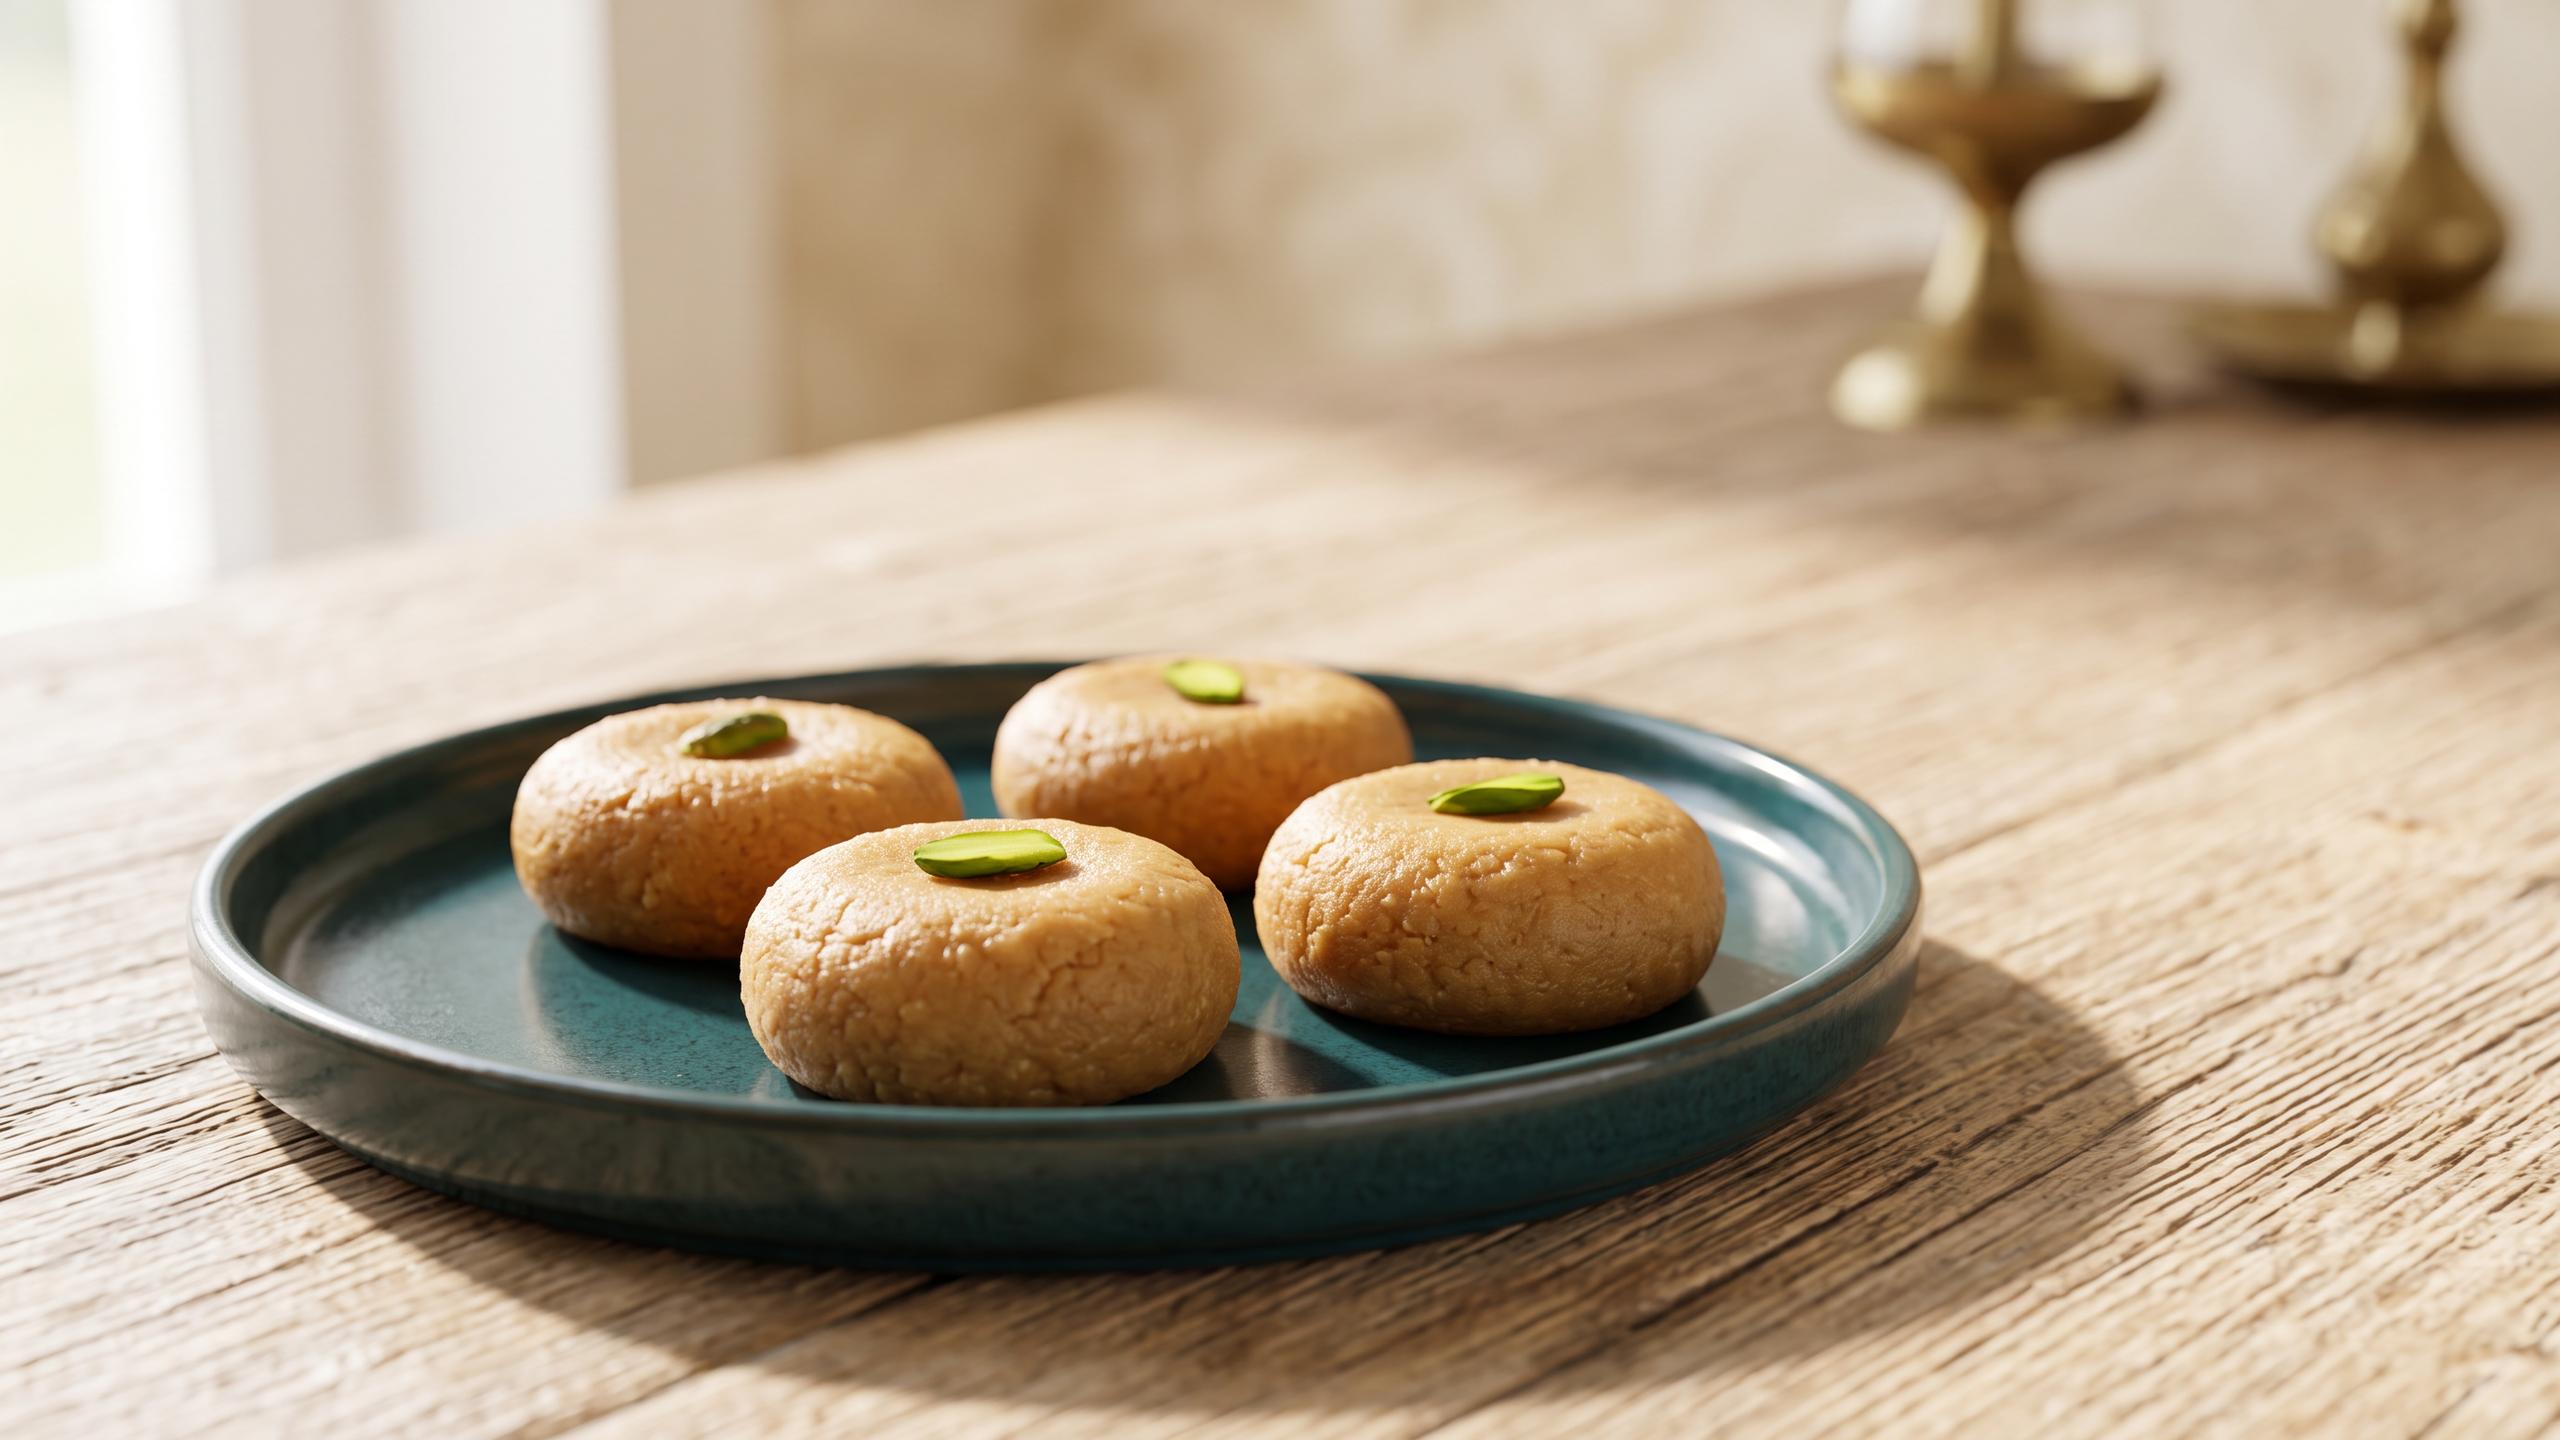
offerings for Krishna, who, in his youth as a cowherd, was known for his love of milk and butter. The peda, made from slow-cooked milk solids known as mawa or khoya, is a traditional 'prasad'—a consecrated food offered to deities and then shared among devotees as a blessing. Its unique brownish hue comes from the caramelisation of milk solids during a slow-roasting process, giving it a distinct flavour that separates it from other pedas.
Ingredients You Will Need
This recipe offers a simpler, quicker approach using milk powder to create the mawa base, making it accessible for home cooks. For approximately 18-20 pedas, you will need: 2 cups Milk Powder (full cream is recommended for a richer texture) 1 cup Milk 4-5 tbsp Ghee (clarified butter) 3/4 cup Powdered Sugar (also known as 'bura' or 'tagar') 1/2 tsp Cardamom Powder Extra powdered sugar for coating * Sliced pistachios for garnish (optional)
Step 1: Creating the Peda Base
The heart of the Mathura Peda is its perfectly roasted mawa. Begin by heating 1-2 tablespoons of ghee in a heavy-bottomed, non-stick pan over low to medium heat. Add the milk powder and begin to roast it, stirring continuously to prevent it from burning. As you stir, the milk powder will start to change colour. Break up any lumps that form with your spatula. Continue roasting for about 10-15 minutes, adding the remaining ghee spoon by spoon, until the powder achieves an even, light brown, sandy texture and releases a nutty aroma. This slow roasting is crucial for the signature colour and flavour.
Step 2: Cooking the Mixture
Once the milk powder is well-roasted, slowly pour in the milk while stirring constantly to avoid lumps. The mixture will initially become liquid-like before it starts to thicken. Continue to cook on a low flame, scraping the sides of the pan. In about 5-7 minutes, the mixture will pull away from the sides of the pan and form a single, soft mass. This is your cooked mawa. Turn off the heat and transfer the mixture to a separate plate or bowl to let it cool down. It needs to be just warm to the touch, not hot, before proceeding to the next step.
Step 3: Shaping and Finishing the Pedas
When the mawa mixture is lukewarm, add the powdered sugar and cardamom powder. Knead everything together with your hands until it forms a smooth, pliable dough. If the mixture feels too dry, you can add a few drops of milk. Take small, equal-sized portions of the dough and roll them into smooth balls between your palms. Gently flatten each ball to create the classic, slightly uneven disc shape of a Mathura Peda. To finish, roll each peda in a plate of powdered sugar to give it a light coating. You can make a small indentation in the centre and garnish with a sliver of pistachio if desired.
Tips for Perfect Homemade Pedas
Achieving the perfect texture requires a little care. Always use a heavy-bottomed pan to ensure even heat distribution and prevent the milk solids from burning. Constant stirring on a low flame is non-negotiable for a smooth, evenly coloured base. Don't add the sugar when the mawa mixture is hot, as this can cause the sugar to melt and make the pedas too soft and difficult to shape. Allowing the mixture to cool to a lukewarm temperature is key. These pedas can be stored in an airtight container at room temperature for up to a week.