


Why Your Plants Need Personal Space
When plants grow too close together, they enter a silent battle for survival. Each seedling competes with its neighbours for essential resources: sunlight, water, and soil nutrients. This intense competition means none of them can truly thrive. Overcrowding
leads to weak, spindly plants that are often stunted and produce a disappointing yield. Furthermore, a dense thicket of leaves restricts air circulation. This creates a humid environment that is an open invitation for fungal diseases and pests to take hold. By selectively removing some stems, you are not sacrificing plants; you are choosing champions and giving them the space they need to flourish. Thinning ensures the remaining plants have access to everything they need for strong, healthy development.
The Perfect Time to Thin
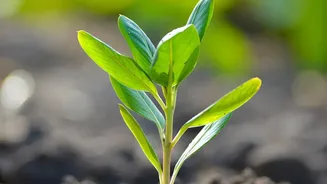
Timing is crucial for successful thinning. The ideal moment to act is when your seedlings have developed one or two sets of “true leaves”. The very first pair of leaves that emerge from a seed are called cotyledons, or seed leaves; they tend to look simple and generic. The leaves that follow are the “true leaves,” which will resemble miniature versions of the adult plant's foliage. At this stage, typically one to three weeks after sprouting, the seedlings are about two to three inches tall. They are established enough to identify the strongest contenders, but their root systems are not yet so intertwined that removing neighbours will cause major disruption. Waiting too long is a common mistake; the tangled roots of older seedlings are nearly impossible to separate without damaging the ones you want to keep.
A Step-by-Step Guide to Thinning
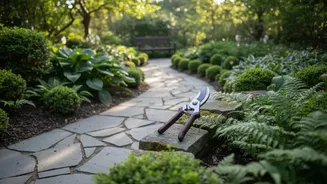
Thinning is a simple process that requires a gentle hand. First, water the soil lightly, as this can make it easier to work with. Then, identify the seedlings you want to keep. Look for the ones with the thickest, sturdiest stems and the healthiest-looking leaves. The goal is to remove the weaker, smaller, or more awkwardly placed seedlings. The preferred method for most plants is to snip, not pull. Use a small, clean pair of scissors or garden shears to cut the unwanted seedlings off at the soil line. This prevents you from accidentally pulling up or disturbing the delicate roots of the neighbouring plants you've chosen to keep. For some root vegetables like carrots or radishes, you may gently pull the entire plant, especially if the soil is loose. If you do this, hold the soil down with one hand while gently pulling the seedling up with the other to minimize disturbance.
Which Plants Benefit Most?
While many plants benefit from thinning, it’s particularly critical for those with very small seeds that are difficult to space out perfectly during sowing. In an Indian home garden, this technique is essential for a variety of popular vegetables and herbs. Root vegetables like carrots, radishes, and beets must be thinned to allow their roots to develop properly without becoming misshapen. Leafy greens such as spinach and lettuce need space to grow large, robust leaves. Vegetables like tomatoes and cucumbers, often started from seed, benefit from thinning to a single strong plant per pot before transplanting. Herbs including basil, coriander, and parsley also produce more abundantly when they aren't crowded, allowing for better air circulation and bushier growth. Always check your seed packet for the recommended final spacing for each specific plant variety.
What to Do With the Thinnings
Don't let your thinned seedlings go to waste. Many of them are perfectly edible and can be considered the first tiny harvest from your garden. The tender young greens from thinned lettuce, spinach, beets, and radishes make a delicious and nutritious addition to salads. Similarly, the tops of carrots and the tiny leaves of thinned brassicas like kale or cabbage are also edible. You can treat them as microgreens, adding a fresh, flavourful punch to your meals. If you're hesitant to discard any seedlings, you can attempt to transplant the extras, especially for sturdy plants like tomatoes. Gently separate them, move them to a new pot, and water them well. Be aware that this process can be stressful for the plant and success is not guaranteed, but it's often worth a try.