



The Appeal of the Quick Fix
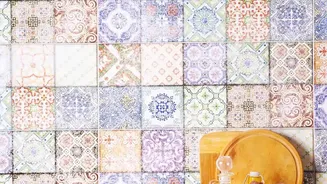
Temporary backsplashes, most often sold as self-adhesive sheets or individual tiles, are a go-to for DIY enthusiasts. They come in a huge variety of styles, from classic subway tile to intricate mosaics, mimicking the look of ceramic, stone, and glass
without the need for messy grout or mortar. Their main draw is simplicity; in theory, you just peel off the backing and stick them to a clean wall for an instant transformation. This makes them particularly popular with renters who want to personalize a space without making permanent changes, or homeowners looking for a budget-friendly refresh.
The Reality of Heat Resistance
Here's where expectations need to be managed. The term "heat-resistant" is used often but can be misleading. Most temporary backsplashes are made of vinyl or PVC materials. While many are rated to handle the general warmth of a kitchen, they are not designed for direct, high heat. Placing standard vinyl tiles too close to a gas stove's open flame or even the back burners of a powerful electric or induction cooktop can be a recipe for disaster. The adhesive can soften and fail, causing tiles to warp, discolor, or peel off. For safety, manufacturers generally recommend keeping the tiles at least 6 to 8 inches away from direct heat sources. If you have a stove without a built-in back panel, consider installing a metal or glass sheet as a buffer in the high-heat zone and using the peel-and-stick tiles on the surrounding walls.
The Sticky Situation of Removal
The other major consideration is removal. While marketed as temporary, the adhesives on these tiles are designed to be strong. How easily they come off depends on several factors: the quality of the tile's adhesive, how long it's been on the wall, the type of wall surface, and whether the surface was properly prepared. On a smooth, well-primed, and painted surface, removal might be straightforward. However, on matte paint, unprimed drywall, or textured walls, the adhesive can bond so strongly that it pulls off paint or even the paper layer of the drywall upon removal. Some renters have found that despite being marketed as renter-friendly, the products can cause enough damage to put a security deposit at risk.
Best Practices for Success
To get the best results and avoid frustration, preparation is everything. Start with a wall that is as smooth, clean, and non-porous as possible. Clean the wall thoroughly with a degreaser to remove any kitchen grime, and ensure it is completely dry before you begin. If your walls have a matte or textured finish, sanding them smooth and applying a good quality primer can create a better surface for both adhesion and eventual removal. When installing, plan your layout before you start peeling, use a level to ensure straight lines, and press firmly across the entire tile to ensure a strong bond and push out any air bubbles.
Tips for a Clean Removal
When it's time to remove the backsplash, don't just pull. A little patience and a heat source can make a huge difference. Use a hairdryer to gently warm up the tile's surface. This will soften the adhesive, making it easier to peel away. Start at a corner and pull gently and slowly at an angle, keeping the tile low to the wall rather than pulling it straight out. If you encounter stubborn resistance, apply more heat. For any sticky residue left behind, a citrus-based adhesive remover can often clean it up without damaging the paint underneath, but always test it on a small, inconspicuous area first.