




Reading the Root Signals
Before you can solve the problem, you have to confirm the diagnosis. A plant that has become 'root-bound' or 'pot-bound' will send out several distress signals. One of the most obvious is seeing roots poking out of the drainage holes or even circling
the soil surface. Another key indicator is a sudden change in watering needs. If water rushes straight through the pot when you water, or if the soil dries out unusually fast, the roots have likely displaced much of the soil. This leaves little medium to retain moisture. You might also notice stunted growth, smaller new leaves, or yellowing lower leaves despite consistent care. If you see a combination of these signs, it's time for a closer look. Gently sliding the plant out of its pot is the ultimate confirmation; if you see more roots than soil in a tangled, circular mass, your plant is definitely root-bound.
Why a Crowded Pot Changes Everything
When a plant becomes root-bound, its container is no longer a healthy home. The dense, circling mass of roots has displaced the soil that's meant to hold water and nutrients. This creates two major problems for your watering routine. First, with less soil, the pot simply can't hold as much water as it used to, causing it to dry out with surprising speed. Second, the compacted root ball can become hydrophobic, meaning it actively repels water. Water will often run down the sides of the pot and straight out the bottom, leaving the central root mass completely dry. The tangled roots also struggle to absorb water and nutrients efficiently, and the lack of space restricts access to oxygen, which is essential for healthy root function. This is why a previously thriving plant can suddenly look wilted, thirsty, and malnourished, even when you think you're watering it correctly.
The Step-by-Step Repotting Guide
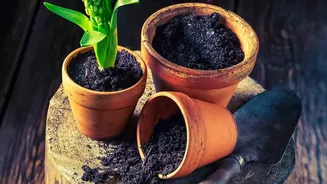
Rescuing your plant is easier than it sounds. First, choose a new pot that is only about 1 to 2 inches larger in diameter than the current one. Going too big can lead to soil staying wet for too long, causing root rot. To remove the plant, turn it on its side and gently tap or squeeze the pot to loosen the root ball; avoid pulling the plant by its stem. Once it's out, examine the roots. Gently massage the bottom and sides of the root ball to loosen the tightly coiled roots. Don't worry if a few small roots break; the goal is to encourage them to grow outward into the new soil. Place a layer of fresh potting mix in the bottom of the new pot, set the plant inside, and fill in the sides, making sure the top of the root ball is about an inch below the rim of the pot. Gently tap the pot to settle the soil, eliminating major air pockets.
A Gentle Trim: Pruning Overgrown Roots
In severe cases where the roots are extremely dense and matted, a little pruning can be beneficial. If you can't manually tease the roots apart, you have a couple of options. One method is to take clean scissors or a knife and make a few shallow, vertical cuts down the sides of the root ball. This breaks the circling pattern and stimulates new outward growth once repotted. Another option is to trim away the bottom third of the root mass, especially if it's a thick, tangled mat. Always use sharp, clean tools to make precise cuts. Remove any roots that appear brown, mushy, or dead, keeping the healthy, firm, white roots. While it may feel drastic, this strategic pruning can be the key to reviving a severely constrained plant and giving it the best chance at a healthy future in its new pot.
Aftercare for a Happy Plant
Your plant has just been through a significant procedure, so a little post-operative care is in order. After repotting, water the plant thoroughly until you see water run from the drainage holes. This helps settle the new soil around the roots. In the first few weeks, be mindful not to overwater. The root system is adjusting and won't be absorbing water as efficiently just yet. It's also best to hold off on fertilizing for at least a month. The fresh potting mix contains nutrients, and the recovering roots are sensitive and can be burned by excess fertilizer. Place the plant in a spot with appropriate, indirect light and monitor it for any signs of stress. Some initial wilting can be normal, but the plant should perk up within a week or two as its roots begin to explore their new, spacious home.