





The Science of Wicking
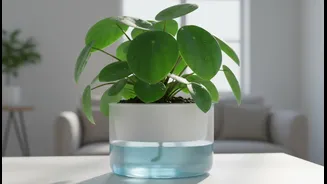
This system works using a principle called capillary action, which is the ability of a liquid to flow through narrow spaces without any external help, even against gravity. An absorbent wick, like a rope or strip of fabric, acts as a bridge. One end sits
in a water reservoir, and the other is buried in your planter's soil. The soil draws moisture from the wick as it begins to dry out. When the soil is sufficiently moist, the process slows down. This creates a self-regulating system that provides your plants with a steady supply of water directly to their roots, preventing both overwatering and underwatering.
Gathering Your Budget-Friendly Materials
The beauty of this project lies in its affordability. You can make an effective system using recycled materials and basic supplies. You will need planters (any container without drainage holes will do), a larger container for your central water reservoir, wicking material, and a good quality potting mix. For the wicks, synthetic materials are best because they resist rot. Nylon rope, acrylic yarn, or polyester shoelaces are excellent choices. Avoid natural fibers like cotton unless you plan to replace them every few months, as they will decompose. For the planters, consider using large plastic tubs, five-gallon buckets, or any decorative pot you have on hand.
Step 1: Prepare Your Wicks and Reservoir
First, prepare your wicking material. Cut your rope or fabric into lengths sufficient to reach from the bottom of your water reservoir to a few inches into the soil of each planter. A good rule of thumb is to have at least one wick per plant. It's a wise idea to soak the wicks in water before installation to kick-start the capillary action. For the reservoir, choose a container that can hold enough water to last for your desired period. An opaque container is ideal as it will help prevent algae growth by blocking sunlight. Position the reservoir so that it is slightly elevated above the base of your planters; this can help ensure consistent flow.
Step 2: Assemble the Planter Array
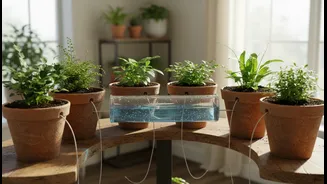
This system is designed to water multiple planters from one source. Arrange your planters around the central reservoir. Take one end of a pre-soaked wick and place it at the bottom of the reservoir. You can tie it to a small weight like a nut or bolt to ensure it stays submerged. Run the wick to one of your planters. There are two main ways to insert the wick into the planter. You can either thread it up through an existing drainage hole (if converting a standard pot) or simply bury the end about three inches deep into the soil from the top. Ensure there is good contact between the wick and the potting mix. Repeat this process for each planter, connecting them all back to the central reservoir.
Step 3: Planting and Final Setup
Use a lightweight, porous potting mix, as heavy soil can compact and hinder the wicking process. Mixes with perlite or vermiculite are great for aeration and moisture absorption. Fill your planters with the soil, burying the wicks as you go. Once filled, add your plants. For the very first watering, it's important to water the plants thoroughly from the top. This settles the soil around the roots and ensures the wicking system has a moist environment to start working with. After this initial watering, you can fill your reservoir and let the wicks take over. The soil will now pull water from the reservoir as needed.
Tips for Success and Troubleshooting
Like any system, a little monitoring goes a long way. Check that the water level in the reservoir is decreasing over time; if it's not, the wicks may have dried out or lost contact with the soil. Simply re-soaking the wick and repositioning it can solve the problem. Over time, fertilizer salts can build up in the soil, which can be harmful to plants. Every few months, it's good practice to flush the soil by watering heavily from the top and letting it drain freely (you may need to temporarily create a drainage hole or tip the planter). Also, be mindful that not all plants are suitable for this system. Drought-loving plants like succulents and cacti may get too much moisture, so this setup is best for species that prefer consistently moist soil, such as ferns, tomatoes, and most leafy greens.