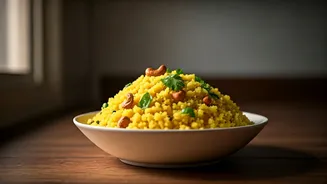


The Underrated Breakfast Hero
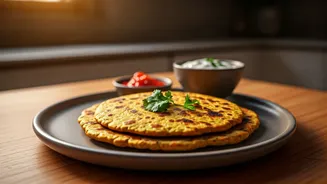
The chilla, a savoury Indian pancake made from gram flour (besan), is a powerhouse of nutrition and flavour. It’s naturally gluten-free, rich in protein, and takes mere minutes to whip up. Unlike heavy, carb-loaded breakfasts that can leave you feeling
sluggish, a well-made chilla provides steady energy to carry you through the morning. It’s the kind of simple, honest food that has been a staple in Indian kitchens for generations, yet its magic is often overlooked in our rush for convenience. This recipe aims to bring that magic back to your breakfast table, proving that a spectacular start to the day doesn’t require complex ingredients or hours of effort.
Gathering Your Simple Ingredients
The beauty of a chilla lies in its simplicity. You likely have most of these ingredients in your pantry already. This recipe makes about 4-5 medium-sized chillas.
**For the batter:**
- 1 cup Besan (Gram Flour)
- Approx. ¾ to 1 cup Water (adjust for consistency)
- ½ teaspoon Ajwain (Carom Seeds)
- ¼ teaspoon Haldi (Turmeric Powder)
- ½ teaspoon Red Chilli Powder (or to taste)
- Salt to taste
**For the fillings (all finely chopped):**
- 1 small Onion
- 1 small Tomato (deseeded)
- 2 tablespoons fresh Coriander Leaves
- 1 Green Chilli (optional, for extra heat)
- Oil or Ghee for cooking
Crafting the Perfect Batter
The secret to a flawless chilla—one that’s neither too thick nor brittle—is in the batter. In a mixing bowl, add the besan, ajwain, turmeric powder, red chilli powder, and salt. Whisk these dry ingredients together to combine them evenly. Now, pour in about half a cup of water and start whisking. The key is to add water gradually while continuously mixing to create a smooth, lump-free batter. Keep adding water slowly until you reach a flowing consistency, similar to a standard pancake batter. It should coat the back of a spoon without being too thick or watery. Once smooth, stir in the finely chopped onion, tomato, coriander, and green chilli. Let the batter rest for 10-15 minutes. This step is crucial; it allows the besan to fully hydrate, resulting in a softer, more flavourful chilla.
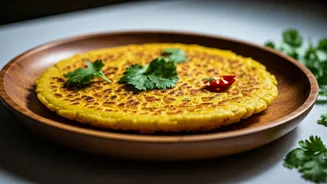
The Art of Cooking the Chilla
Now for the fun part. Heat a non-stick tava or a well-seasoned cast-iron pan over medium flame. A properly heated pan is key; if it's too hot, the chilla will burn before cooking through, and if it's not hot enough, it will stick. Drizzle a few drops of oil or ghee and spread it around. Once the pan is hot, pour a ladleful of the batter onto the centre. Working quickly, use the back of the ladle to spread the batter outwards in a circular motion to form a thin, even pancake. Let it cook for about 2-3 minutes, or until the top looks set and the edges start to lift. Drizzle a little more oil around the edges and on top. Using a flat spatula, carefully flip the chilla. Cook the other side for another 1-2 minutes until it has golden-brown spots all over. Press down gently with the spatula to ensure it cooks evenly.
Tips for Truly Magical Results
To elevate your chilla from good to magical, keep these tips in mind. First, don't skip the ajwain; it not only adds a beautiful, aromatic flavour but also aids in digestion. Second, for an extra-crispy chilla, you can add one or two tablespoons of rice flour or sooji (semolina) to the dry ingredients. For a fluffier, softer texture, a tiny pinch of baking soda can be added to the batter just before cooking. Finally, always use finely chopped vegetables. Chunky pieces will prevent you from spreading the batter thinly and can cause the chilla to break. Feel free to experiment with other additions like grated carrots, capsicum, or even crumbled paneer for a protein boost.