







Understanding the World Beneath the Soil
Before you even think about repotting, it’s helpful to understand what’s happening underground. A plant's root system is its lifeline. Far from being simple straws, roots perform several vital jobs. They anchor the plant, keeping it stable and upright.
They are also responsible for absorbing all the water and nutrients the plant needs to survive and grow. These roots, especially the fine, almost invisible root hairs, are incredibly delicate. When they are broken or damaged, the plant's ability to drink and eat is severely hampered. This damage is what leads to a condition many gardeners call 'transplant shock'—when a newly repotted plant wilts, droops, or turns yellow as it struggles to recover. Following instructions carefully helps minimise this shock.
Reading the Signs: When to Repot
Repotting isn’t about a strict schedule; it’s about responding to your plant's needs. Acting at the right time is the first step in ensuring its safety. One of the most obvious signs is seeing roots growing out of the drainage holes at the bottom of the pot. Another clue is if the plant has stopped growing or its growth has slowed dramatically during its growing season. If you find you have to water your plant much more frequently than you used to because the soil dries out instantly, it might be because the pot is full of roots with very little soil left to hold moisture. Sometimes, you can gently slide the plant out of its pot to check. If you see more roots than soil, forming a tightly wound mass, the plant is 'root-bound' and ready for a new home.
Step 1: Prepare for a Smooth Transition
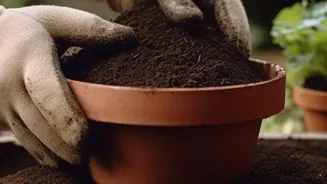
Good preparation is key to a stress-free repotting process for both you and your plant. First, choose a new pot that is only slightly larger than the old one—typically 1 to 2 inches wider in diameter is a good rule of thumb. Moving to a pot that is too large can lead to the soil staying wet for too long, which can cause root rot. Ensure the new pot has drainage holes. Next, select the right potting mix. Using soil from your garden is a common mistake; it's too dense, compacts easily, and can suffocate the roots which need oxygen to function. Different plants have different needs, but a quality, well-draining potting mix is a good start for most houseplants. Watering your plant a day or two before repotting can also help, as moist soil holds together and the roots are more flexible and less prone to breaking.
Step 2: Gently Removing the Plant
This is where many beginners damage the roots. Never pull the plant out by its stem. This can snap the roots or even separate the entire root ball from the plant. Instead, turn the pot on its side and gently tap the bottom and sides to loosen the soil. Try to coax the plant out, supporting the base of the stems with one hand while the pot comes away. If the plant is really stuck, you can run a butter knife or a small trowel around the inside edge of the pot to free the root ball. If it's in a flexible plastic nursery pot, you can squeeze the sides of the pot to help release it. A few broken roots are inevitable, but the goal is to keep the main root ball as intact as possible.
Step 3: Inspecting and Positioning
Once the plant is free, take a moment to look at the roots. If they are tightly circling the bottom, you can gently tease the lower roots apart with your fingers to encourage them to grow outwards into the new soil. Avoid aggressively breaking up the root ball, as this causes unnecessary stress. Place a layer of fresh potting mix in the new pot and position the plant in the center. The top of the root ball should sit about an inch below the rim of the new pot. Planting it too deep is a critical error, as burying the part of the stem that was previously exposed can lead to rot.
Step 4: Backfilling and Settling In
With the plant correctly positioned, begin adding fresh potting mix around the sides of the root ball. Gently press the soil down to eliminate any large air pockets, which can dry out sections of the roots, but don't compact it too tightly. Once the pot is filled, give the plant a thorough watering. This is a crucial final step, as it helps the new soil settle around the roots, removes any remaining air pockets, and provides the hydration the plant needs to begin its recovery. This initial watering ensures good contact between the roots and their new, nutrient-rich environment.