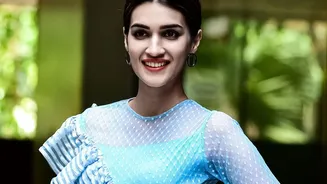





The classic smoky eye is a party staple, but it can feel intense. Enter its chicer, more modern cousin: the brown smoky eye. Inspired by style icon Kriti Sanon, this look offers a softer, subtle, and incredibly versatile finish for any celebration.
Why Brown is the New Black
While
a traditional black smoky eye is bold and dramatic, it can sometimes be overpowering or difficult for beginners to master. A brown smoky eye, however, provides a universally flattering warmth that enhances your natural features without looking too heavy. Shades of coffee, chocolate, and bronze are less intimidating to work with and offer a more diffused, wearable glamour that transitions seamlessly from an afternoon gathering to a late-night party. As seen on celebrities like Kriti Sanon, the brown smoky eye is celebrated for its ability to create depth and dimension while maintaining an air of effortless sophistication. It’s the perfect choice for when you want to look polished and put-together without the intensity of jet-black shades.
Gather Your Essential Toolkit
To recreate this elegant look, you don’t need a professional makeup artist’s entire kit. A few key products will set you up for success. First, an eyeshadow primer is non-negotiable; it prevents creasing and ensures your look lasts all night. Next, you'll need an eyeshadow palette with a few complementary brown shades—at least a light taupe or tan for transition, a medium chocolate brown for definition, and a deep espresso or cocoa for the smoky effect. A touch of a shimmery champagne or gold shadow for the lid is optional but adds a festive touch. Finally, grab a creamy brown eyeliner pencil, a good blending brush, and your favourite mascara.
Step 1: Prep and Prime Your Canvas
The secret to a flawless, long-lasting smoky eye is starting with a well-prepped base. Apply a thin layer of eyeshadow primer across your entire eyelid, from the lash line up to the brow bone. This not only helps the eyeshadow colours appear more vibrant but also creates a smooth surface for blending and prevents the shadow from settling into fine lines. If you don't have a primer, a dab of full-coverage concealer blended out with your finger works as a great alternative. Let it set for a moment before you begin applying colour.
Step 2: Build the Foundation with a Transition Shade
Using a fluffy blending brush, pick up the lightest matte brown or tan shade from your palette. Sweep this colour into your crease, using gentle, back-and-forth windshield-wiper motions. This 'transition shade' creates a soft gradient and acts as a map for where your deeper colours will go. The goal is to create a seamless fade that adds natural depth to the eye socket. This initial step is crucial for ensuring there are no harsh lines later on.
Step 3: Define with a Deeper Brown
Now, take a slightly smaller, more tapered brush and dip it into your medium brown eyeshadow. Focus this colour on the outer third of your eyelid and blend it into the crease, staying just below the lighter transition shade you already applied. This is where the 'smoky' shape begins to form. Build the colour gradually in thin layers to control the intensity. You can also sweep a small amount of this shade along your lower lash line to balance the look and create a cohesive, defined shape.
Step 4 : Create That Subtle Smoky Effect
For the final touch of drama, use a pencil brush or your finger to pat the darkest brown eyeshadow onto the outer corner of your eyelid, keeping it close to the lash line. The key to a 'subtle' finish is to use this dark shade sparingly. Then, take your brown eyeliner pencil and trace your upper lash line, gently smudging it with the dark shadow to create a soft, hazy line instead of a sharp wing. This technique defines the eyes beautifully without looking harsh. Many makeup artists smudge a brown pencil on the lower lash line as well for a complete, sultry gaze.
Step 5 : Blend and Brighten
Blending is the most important part of any smoky eye. Take a clean, fluffy brush and gently blend the edges where the different shades meet. Use soft, circular motions to diffuse any harsh lines and create a smooth, professional-looking gradient. Once you are happy with the blend, add a pop of party-ready shimmer. Dab a light, metallic eyeshadow—like a warm gold or soft champagne—onto the center of your eyelid with your fingertip. This catches the light and makes your eyes appear brighter and more open. Finish with two generous coats of volumizing mascara on your upper and lower lashes to complete the look.