


What is Surya Namaskar?
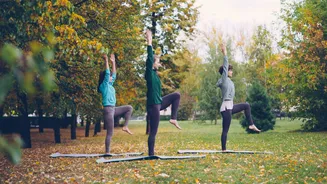
Surya Namaskar is a sequence of twelve yoga postures (asanas) performed in a continuous, flowing cycle. The name comes from Sanskrit, where 'Surya' means 'Sun' and 'Namaskar' means 'salutation' or 'to bow down'. It is a gesture of gratitude to the sun,
which symbolizes energy and life. This dynamic sequence alternates between forward and backward bending poses, which helps stretch and strengthen the entire spinal column and engage all major muscle groups. When synchronized with breath, it becomes a form of moving meditation, providing a holistic workout for both body and mind. It's best practiced in the morning on an empty stomach to energize the body for the day ahead.
Step 1: Pranamasana (Prayer Pose)
Begin by standing at the front of your yoga mat with your feet together and weight balanced evenly. As you exhale, bring your palms together in a 'Namaste' gesture at your heart centre. Your spine should be erect and your shoulders relaxed. This initial pose helps to ground your energy and establish a sense of calm and balance before you begin the flow.
Step 2: Hasta Uttanasana (Raised Arms Pose)
Inhale and lift your arms up and back, keeping them close to your ears. Gently arch your back from your upper spine, pushing your pelvis slightly forward. This pose is a gentle backbend that stretches the chest, shoulders, and abdomen. The aim is to lengthen the entire body from the heels to the tips of your fingers.
Step 3: Hasta Padasana (Hand to Foot Pose)
Exhale and hinge forward from your hips, keeping your spine straight. Bring your hands down to the floor beside your feet. If you're a beginner, it's perfectly fine to bend your knees to allow your palms to touch the mat. Let your head hang loose and try to bring your nose towards your knees. This pose provides a deep stretch for the hamstrings and back.
Step 4: Ashwa Sanchalanasana (Equestrian Pose)
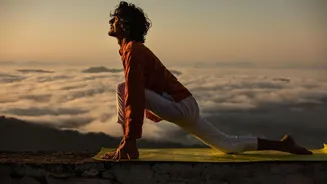
Inhaling, push your right leg back as far as you can. Bring your right knee to the floor and look up. Your left foot should be exactly between your palms with the left knee bent at a 90-degree angle. This pose gives a good stretch to the hip flexors and quadriceps on the right side and strengthens the left leg.
Step 5: Dandasana (Stick Pose)
As you exhale, take your left leg back and bring your whole body into a straight line, like a plank. Your arms should be perpendicular to the floor, with your shoulders directly above your wrists. Engage your core muscles to prevent your hips from dropping. This pose is excellent for building arm, shoulder, and core strength.
Step 6: Ashtanga Namaskara (Eight-Limbed Salutation)
Gently bring your knees down to the floor and then exhale. Slowly lower your chest and chin to the floor, keeping your hips slightly raised. In this pose, two hands, two knees, your chest, and your chin (eight parts in total) touch the floor. This posture builds strength in the chest and arms.
Step 7: Bhujangasana (Cobra Pose)
Slide forward and raise your chest up as you inhale, creating a gentle backbend. Your elbows should be bent, and your shoulders away from your ears. Look upwards. Bhujangasana increases spinal flexibility, tones the abdomen, and can help relieve stress and fatigue.
Step 8: Adho Mukha Svanasana (Downward-Facing Dog)
Exhaling, lift your hips and tailbone up to form an inverted 'V' shape. Press your heels towards the floor and keep your head between your upper arms. This pose provides a full-body stretch, especially for the hamstrings, calves, and spine, while also strengthening the arms and shoulders.
Step 9: Ashwa Sanchalanasana (Equestrian Pose)
As you inhale, bring your right foot forward between your hands. Your left knee comes down to the floor. Push your hips down and look up. This is a repeat of Step 4, but with the opposite leg forward, ensuring a balanced stretch for both sides of your body.
Step 10: Hasta Padasana (Hand to Foot Pose)
Exhale and bring your left foot forward next to your right foot. Hinge at the hips and fold forward, keeping your hands on the floor. As before, you can bend your knees if needed. This is a return to the Hand to Foot pose, revisiting the hamstring and back stretch.
Step 11: Hasta Uttanasana (Raised Arms Pose)
Inhaling, roll your spine up. Raise your hands up and bend backward slightly from the waist, as in Step 2. This movement continues the fluid motion of the sequence, opening up the chest and stretching the front of the body once more.
Step 12: Pranamasana (Prayer Pose)
Finally, exhale and first straighten your body, then bring your arms down. Place your palms together in front of your chest, returning to the starting position. This completes one round of Surya Namaskar. Take a moment here to notice the flow of energy and the sensation in your body before starting the next round.