


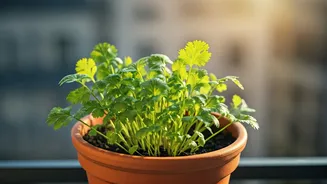


First, Diagnose the 'Scorch'
The term 'scorched' is a catch-all for crispy, brown, or yellowing fronds. While direct sunlight can certainly burn a fern's delicate leaves, it's often not the only culprit. More frequently, the issue is environmental stress. Ferns thrive in humidity,
and the dry air in our homes, especially with air conditioning or heating, can cause their fronds to dry out and die. Underwatering is another common cause; ferns prefer their soil to be consistently moist, but not waterlogged. Finally, tap water in many parts of India can be hard or contain minerals that build up in the soil over time, interfering with the plant's ability to absorb water and nutrients, leading to what looks like a burn.
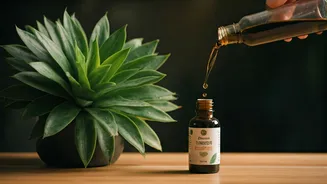
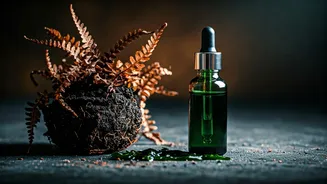
The Plant Ambulance: What Is Seaweed Extract?
Think of liquid seaweed not as a simple fertiliser, but as a revitalising tonic or a vitamin shot for your ailing plant. Harvested from the sea and typically cold-pressed to preserve its goodness, seaweed extract is packed with over 60 different micronutrients, minerals, and vitamins. More importantly, it's a rich source of natural plant growth hormones like cytokinins, which promote cell division and leaf growth, and auxins, which encourage root development. When a fern is stressed, its own internal systems slow down. Seaweed extract gives it a gentle, organic boost, helping it build resilience, repair cellular damage, and stimulate new, healthy growth from the roots up.
Your Step-by-Step Fern Rescue Mission
Ready to play plant doctor? It’s a simple process. First, perform a bit of triage. Using clean, sharp scissors, carefully snip off any fronds that are completely brown and crispy right at the base. They won't turn green again, and removing them allows the plant to direct its energy towards new growth. Next, prepare the magic potion. Read the instructions on your liquid seaweed bottle carefully. The dilution rate is crucial; a little goes a long way, and too strong a mixture can be counterproductive. A common ratio is about 2-5ml of seaweed concentrate per litre of water. Use filtered or distilled water if possible to avoid adding more minerals to the soil. Water your fern thoroughly with this solution, letting the excess drain completely from the bottom. Don't let the pot sit in a saucer of water.
Application and Follow-Up Care
For the initial rescue, watering the soil is most important as it helps the roots. You can repeat this seaweed-infused watering every two to three weeks during the growing season (spring and summer). For an extra boost, you can also create a much more diluted foliar spray (about 1ml per litre) and lightly mist the remaining fronds once a week. This helps increase local humidity and allows the leaves to absorb some nutrients directly. Be patient. You won't see a dramatic change overnight. Look for signs of new growth—tiny, curled fronds (called fiddleheads) emerging from the centre of the plant—within a few weeks. This is the sign your rescue mission is a success.
Long-Term Health and Prevention
Using seaweed extract is a great recovery tool, but preventing the scorch in the first place is the ultimate goal. Ensure your fern is in the right spot. They prefer bright, indirect light—a north-facing window or a spot a few feet away from an east-facing one is ideal. Boost humidity by placing the pot on a tray of pebbles filled with water (ensuring the pot isn't touching the water) or by grouping it with other plants. Get into a consistent watering routine, checking the soil every few days and watering when the top inch feels slightly dry to the touch. With the right care, your fern won't just survive; it will thrive, and your seaweed drops can be used as a regular health tonic rather than an emergency measure.