
Your Smartphone, Your Starter Scope
Your phone's camera is surprisingly capable of capturing the Moon. The main challenge is that its default settings often overexpose our bright lunar neighbour, turning it into a fuzzy white blob. The key is to take manual control. Most modern phones have
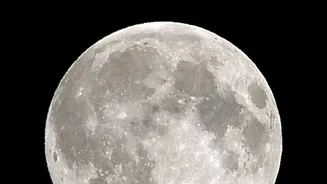
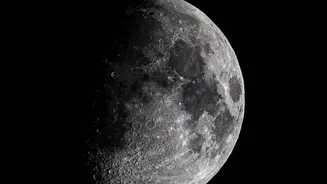
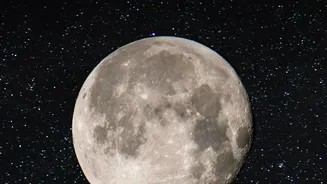
a 'Pro' or 'Manual' mode in the camera app. Here, you can adjust crucial settings. First, lower the ISO—your camera's sensitivity to light—to its minimum setting, like 100 or 200, to reduce graininess. Next, tap on the Moon on your screen to focus, then use the exposure slider that appears to darken the image until you can see surface details like craters. Using the digital zoom sparingly can help frame the shot, but avoid zooming too much as it will degrade the image quality.
Stability Is Not Optional
The single most important piece of 'everyday equipment' for night photography is something to keep your camera perfectly still. Any slight movement will result in a blurry image, especially when zoomed in. A tripod is the ideal solution. You can find inexpensive smartphone mounts that attach to any standard camera tripod. If you don't have one, get creative. Lean your phone against a wall, a stack of books, or a windowsill to keep it steady. To avoid camera shake when you tap the shutter button, use your camera's built-in timer (set it for 2 or 3 seconds) or a pair of headphones with a volume control button, which often doubles as a remote shutter.
Level Up with Binoculars
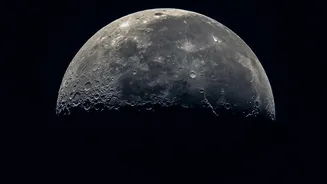
To get a closer view, you can pair your phone with a regular pair of binoculars. This technique, called 'digiscoping', involves holding your phone's camera lens up to the eyepiece of the binocular. While you can do this by hand with some patience, the best results come from using a tripod for the binoculars and a smartphone adapter to hold the phone securely against the eyepiece. This setup effectively turns your binoculars into a telephoto lens, allowing for much more detailed shots of the Moon. The quality of your binoculars matters; better optics will produce a sharper and clearer image. Even with a basic setup, you can achieve impressive results and bring lunar seas and craters into clear view.
Using a DSLR or Mirrorless Camera
If you have a DSLR or mirrorless camera with a telephoto or zoom lens, you're in an excellent position to capture both the Moon and planets. Switch your camera to Manual (M) mode. Set your lens to manual focus and use the camera's live view screen, zooming in digitally to fine-tune the focus on the edge of the Moon or a bright star until it's perfectly sharp. For the Moon, start with an ISO of 100, an aperture of around f/8 to f/11 for sharpness, and a shutter speed of about 1/125th of a second. You can adjust from there. A sturdy tripod is essential here as well.
Finding and Shooting the Planets
Planets like Jupiter, Saturn, Mars, and Venus are visible to the naked eye and can be photographed without a telescope. They will appear as bright, non-twinkling 'stars'. With a smartphone or a wide-angle lens, they will look like distinct points of light, but you can capture their colour—like Mars' reddish hue. For a DSLR with a telephoto lens (200mm or more), you can begin to resolve them as tiny discs. For Jupiter, you might even capture its four largest moons as tiny dots in a line. Use the same principles: a tripod, manual focus, and experimenting with exposure settings. Apps like Stellarium, Star Walk 2, or Sky Guide can help you locate which planets are visible in your current night sky.
The Magic of Post-Processing
A little editing can transform a good shot into a great one. You don't need complex software. Free mobile apps like Snapseed or even your phone's built-in photo editor can make a huge difference. Try slightly increasing the contrast and structure (or sharpness) to make the details on the Moon's surface pop. If your image has a colour cast, adjusting the white balance can make the Moon appear a more natural grey. The key is to make subtle adjustments that enhance the details you've already captured without making the image look artificial.