





Why Proper Cleaning Is Non-Negotiable
Skipping the cleaning process might seem like a time-saver, but it can doom your plant before it even has a chance to grow. Leftover fruit residue and sugars from the coconut meat create a breeding ground for mould, harmful bacteria, and fungi. These
microorganisms can cause the shell to rot prematurely and can introduce diseases to the soil, harming or even killing your plant. Furthermore, uncleaned shells can attract pests. Proper sanitation ensures your coconut planter is a healthy home for your plant and will last much longer as a durable container.
Step 1: Sourcing and Opening the Coconut
Start with a mature, brown coconut, as their shells are harder and more durable than those of young, green coconuts. After draining the coconut water by puncturing the soft 'eyes' at one end, the next step is to crack it open. To get two usable halves, you can firmly tap the coconut around its equator with a hammer or the blunt side of a heavy knife until it splits. A handsaw can also be used to create a more precise cut. The goal is to create one or two bowl-shaped pieces that can serve as containers.
Step 2: Removing All Flesh and Fibres
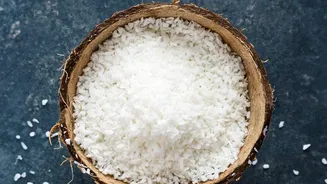
Once opened, all of the white coconut meat must be thoroughly scraped out. A strong spoon or a specialised coconut tool can be used to pry the meat away from the inner wall. It's vital to remove every last bit, as any remaining flesh will decompose and cause problems. After the inside is clean, turn your attention to the exterior. Use a wire brush or coarse sandpaper to scrub off the loose, hairy fibres. This not only gives the shell a cleaner look but also removes material that can hold excess moisture and encourage rot.
Step 3: The Deep Clean and Disinfection
This is the most critical stage for ensuring a safe planter. Raw coconut husks can contain excess salts that can be harmful to plants. Begin by rinsing the scraped shells thoroughly with water. For disinfection, you have two primary options. A chemical method involves soaking the shells in a solution of one part bleach to ten parts water for about 30 minutes. This will effectively kill any lingering pathogens. Alternatively, for an eco-friendlier approach, you can boil the shells in water for 30 minutes or soak them in a vinegar solution. Regardless of the method, you must rinse the shells thoroughly with clean water afterwards to remove any residue.
Step 4: Sanding for a Smooth Finish
For a more polished look and feel, sand both the inside and outside of the clean, dry shell. Start with a coarse-grit sandpaper (around 80-grit) to smooth out any rough patches and remove remaining fibre remnants. Follow up with a finer-grit sandpaper (such as 220-grit or higher) to achieve a perfectly smooth surface, especially around the rim. While not strictly necessary for the plant's health, this step makes the container more aesthetically pleasing and easier to handle.
Step 5: Curing, Drying, and Drainage
Before your coconut planter is ready for soil, it must be completely dry. Allow the shells to air dry in a sunny, well-ventilated spot for several days. This curing process hardens the shell and is a final guard against mould and decomposition. For extra longevity, you can rub the inside and outside with a natural, plant-safe oil like linseed or coconut oil, which helps to waterproof the shell. Finally, and most importantly for plant health, drill a few small drainage holes in the bottom of the shell. This prevents water from pooling and causing root rot, ensuring your plant can thrive in its new, natural home.