





Start Your Treasure Trove of Scraps
The first step to a brilliant zero-waste stock is to become a collector. Keep a large, labelled freezer-safe bag or container handy in your freezer. As you cook throughout the week, instead of heading to the compost bin or trash, simply add your clean
vegetable offcuts to the bag. Think of it as a flavour savings account. Once your bag is full—aim for at least 4 to 6 cups of scraps—you’re ready to make magic. This method not only drastically cuts down on food waste but also ensures you have the building blocks for a delicious stock whenever you need it, for free.
The Best Scraps for a Flavourful Base
Not all scraps are created equal, but many common cast-offs are perfect for stock. The classic foundation includes onions, carrots, and celery. Don't shy away from onion and garlic skins, which add incredible flavour and a beautiful golden colour. Carrot peels and ends, celery leaves and bases, and the tough green parts of leeks are all excellent additions. Mushroom stems provide a deep, earthy umami, while corn cobs can add a surprising sweetness. The stems from fresh herbs like parsley, thyme, and cilantro are also packed with flavour that will infuse beautifully into your stock.
What to Avoid for a Clear, Sweet Stock
Just as important as knowing what to include is knowing what to leave out. Certain vegetables can make your stock bitter, cloudy, or overpowering. The main culprits are cruciferous vegetables like broccoli, cabbage, cauliflower, and Brussels sprouts, which can release sulphuric compounds and an unpleasant taste. While some people use a small amount of broccoli stem without issue, it's generally best to avoid this family of vegetables. Potato peels can make a stock starchy and cloudy, so it's wise to leave them for the compost. Also, avoid anything spoiled, moldy, or rotten, as those flavours will unfortunately find their way into your final product.
The Simmering Process: Patience is Key
Once your scrap bag is full, empty the frozen contents directly into a large stockpot or Dutch oven. Add enough cold water to cover the vegetables by an inch or two. For an even richer flavour, you can add a few whole black peppercorns and a bay leaf or two. Bring the pot to a boil over high heat, then immediately reduce the heat to low. You're aiming for a gentle, steady simmer, not a rolling boil. Let the stock simmer for at least one hour to allow the vegetables to release their flavour. Some recipes suggest simmering for up to two hours for a more concentrated taste, but going much longer can sometimes cause the flavours to deteriorate or turn bitter.
Straining and Storing Your Liquid Gold
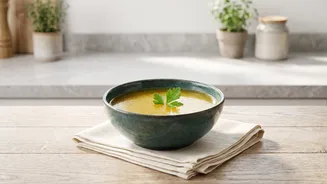
After an hour or so, your kitchen will be filled with a wonderful aroma, and your stock will have taken on a rich colour. Turn off the heat and let it cool slightly. Place a fine-mesh strainer or a colander over another large pot or heatproof bowl and carefully pour the stock through it to separate the liquid from the solids. To get every last drop, you can gently press on the cooked scraps with the back of a spoon. For an exceptionally clear stock, avoid pressing the solids and simply let it drain naturally. Once strained, allow the stock to cool completely before storing. It will keep in an airtight container in the refrigerator for up to a week. For longer-term storage, freeze it. You can pour it into jars (leaving space at the top for expansion), freezer bags, or even ice cube trays for convenient, pre-portioned amounts.