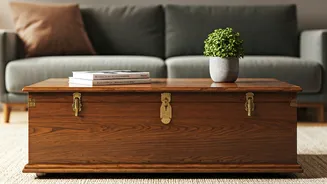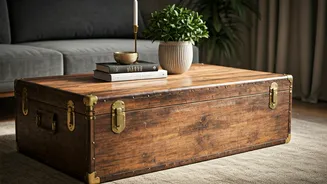


Find the Perfect Foundation
The success of your project starts with the right chest. Look for one with good bones and clean lines. An old 'sandook' or a simple wooden trunk works perfectly. Don't worry too much about surface scratches or a dated finish, as you'll be refinishing
it. Focus on the structure. Is it solid wood? Plywood can work, but solid wood is more durable and easier to sand. Check for any major damage like water warping or wood rot, which are harder to fix. The ideal candidate has a flat top and a simple silhouette. Ornate carvings can be beautiful, but they clash with a minimalist aesthetic, so a simpler form will make your job much easier.
Gather Your Tools and Materials
Before you begin, assemble everything you need. This prevents interruptions and makes the process smoother. You will need: an electric sander or sandpaper (medium and fine grit), a good quality primer, paint in your chosen minimalist colour (matte or satin finish works best), paintbrushes and a small roller, a set of table legs (hairpin legs, tapered wooden legs, or simple metal legs are great minimalist options), a drill, screws appropriate for your legs, wood filler for any dents or holes, cleaning supplies (soap, water, and rags), and a protective topcoat like clear polyurethane. Having everything laid out on a drop cloth in a well-ventilated area will set you up for a professional and enjoyable experience.
Preparation is Everything
Ask any professional painter, and they’ll tell you that 90% of a great finish is in the prep work. Start by removing all hardware—handles, hinges, and latches. Place them in a labelled bag if you plan to reuse or replace them. Next, give the entire chest a thorough cleaning with soap and water to remove decades of dust and grime. Once it’s completely dry, inspect for any deep gouges or old hardware holes. Fill these with wood filler, and once it's dry, sand it smooth. Now, it’s time to sand the entire chest. Start with a medium-grit paper to remove the old varnish and smooth out imperfections, then follow up with a fine-grit paper to create a silky-smooth surface. Wipe away all the dust with a clean, damp cloth before moving on.
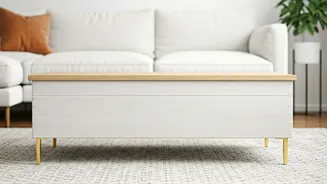
Prime and Paint for a Minimalist Look
With your chest prepped, it's time to bring your vision to life. Applying a coat of primer is a non-negotiable step. It prevents the old wood colour from bleeding through and helps the paint adhere for a durable finish. Once the primer is dry, you can begin painting. For a minimalist look, colour choice is key. Think matte black, crisp white, charcoal grey, or a deep navy. These colours create a sophisticated, clean canvas. Use a small roller for the large, flat surfaces and a brush for the corners and edges. The secret to a flawless finish is to apply two or three thin coats rather than one thick, gloopy one. Allow each coat to dry completely before applying the next.
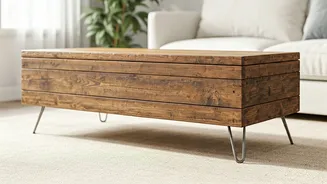
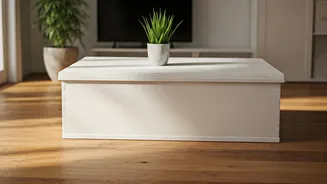
Elevate Your Design with Legs
This is the step that truly transforms your chest from a storage box into a coffee table. Adding legs gives it height, airiness, and a modern profile. Flip your painted chest upside down on a soft surface to avoid scratching the new paint. Position your new legs, one at each corner. Use a tape measure to ensure they are equidistant from the edges for a balanced look. Mark the screw holes with a pencil. To prevent the wood from splitting, it’s a good idea to drill small pilot holes before driving in the screws. Securely attach each leg with your drill. Once all four are firmly in place, flip your table upright and admire the transformation.
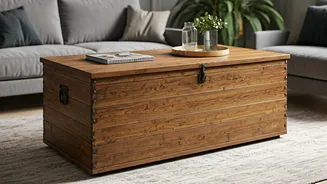
The Finishing Touches
Now for the final details that pull it all together. Decide on the hardware. For a truly minimal look, you could go handle-free. If you need handles, replace the old ones with something sleek and modern, like simple black bar pulls or brushed brass knobs. Next, protect your work. A coffee table sees a lot of action—mugs, books, remote controls. Apply two to three coats of a clear polyurethane in a matte or satin finish to the tabletop. This will protect it from spills, scratches, and daily wear and tear, ensuring your beautiful creation lasts for years. Let it cure completely according to the manufacturer's instructions before placing any items on it.