



Understanding Your Wild Yeast Starter
A sourdough starter is a living culture of wild yeast and beneficial bacteria, captured from flour, water, and the air around us. Think of it as a natural, homemade yeast that you nurture with daily 'feedings' of flour and water. Instead of commercial
yeast, this symbiotic culture of microbes is what makes your bread rise, creating its signature flavour and texture through a slow fermentation process. The beauty lies in its simplicity: all you need are two ingredients and a little patience to get started. The process is a rewarding journey that connects you to an ancient way of baking, perfectly suited for the modern Indian kitchen.
Choosing the Right Indian Flour
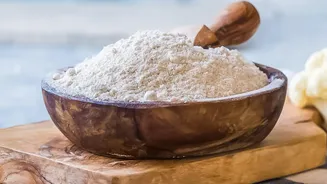
You don’t need imported bread flour to begin. Common Indian flours work wonderfully. Whole wheat atta is an excellent choice for starting because the bran and germ contain more of the natural yeasts and microbes needed for fermentation, which can help your starter become active more quickly. Many bakers find success using 100% atta or a blend of atta and maida (all-purpose flour). A 50:50 mix of atta and maida can provide a great balance; the atta offers robust yeast activity, while the maida lends a lighter texture. Keep in mind that whole wheat flours like atta absorb more water, so you may need to adjust your hydration slightly to achieve a thick, paste-like consistency.
Day 1-3: Bringing Your Starter to Life
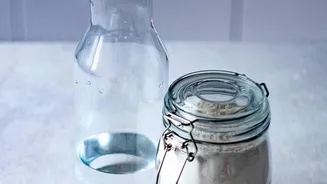
To begin, you'll need a clean glass jar, a kitchen scale for accuracy, and filtered water, as chlorinated tap water can inhibit yeast growth. On Day 1, combine equal parts flour and water by weight—for example, 50 grams of whole wheat atta and 50 grams of room-temperature water. Mix thoroughly until no dry flour remains, cover the jar loosely (a lid resting on top or a cloth works well), and let it sit in a warm spot for 24 hours. India's warm climate can accelerate fermentation, which is a big advantage. Over the next two days, you may or may not see bubbles. This early stage can be unpredictable; you might even notice a brief surge of activity followed by a quiet period. This is normal.
Day 4-7: The Feeding Routine
From Day 4 onwards, you will begin a regular feeding schedule, typically twice a day (every 10-12 hours). To feed your starter, first discard a majority of it, leaving about 25 grams in the jar. This step is crucial as it manages acidity and ensures the microbes have enough fresh food. Then, add fresh flour and water, often in a 1:2:2 ratio (e.g., 25g starter, 50g flour, 50g water). During this period, you should start to see more consistent activity. The mixture will become bubbly, rise predictably after feedings, and develop a pleasant, tangy aroma. Don't worry if you see a layer of liquid ('hooch') forming; it's just a sign your starter is hungry. Simply stir it back in before the next feeding.
Knowing When Your Starter Is Ready
A mature starter, typically ready in 7 to 14 days, will show clear signs of readiness. The most reliable indicator is its growth: a healthy starter should at least double, or even triple, in volume within 4 to 8 hours of being fed. It will have a spongy, web-like texture full of bubbles. You might have heard of the 'float test', where a spoonful of starter is dropped into water. If it floats, it's considered ready because it's full of trapped gas. However, this test isn't always foolproof, especially with denser whole wheat flours like atta, which might not float even when active. Relying on the visual cue of consistent, strong rising is a more dependable measure of your starter's strength.
Troubleshooting Common Issues
Patience is key. If your starter seems sluggish or isn't bubbling much, especially in the first week, don't give up. Ensure it's in a warm spot (around 24-28°C is ideal). If activity slows, try giving it more time between feedings instead of feeding it more often; overfeeding a weak starter can dilute the culture. A change of flour, like incorporating some whole wheat or even a little rye, can also provide a nutrient boost to kickstart activity. If you see any pink or orange streaks or it smells rotten, you must discard it and start again, as this indicates harmful bacteria. However, a wide range of acidic or vinegary smells are perfectly normal parts of the development process.