





The Foundation: Choosing Your Ingredients
The soul of a great naan lies in its simple yet crucial ingredients. The choice of flour is your first big decision. Traditionally, naan is made with maida, a low-protein refined Indian wheat flour that results in a very tender texture. However, all-purpose
flour is an excellent and widely available substitute that yields fantastic, soft results. For a chewier, more 'restaurant-style' naan, some recipes use bread flour, which has a higher protein content. The leavening is another key aspect. While some recipes use yeast for a slow, traditional rise, many quick tawa naan recipes opt for a combination of baking powder and baking soda. These chemical leaveners react with the acidic ingredients to create bubbles and lift, making them perfect for a faster preparation. Lastly, do not underestimate the power of full-fat yogurt (curd) and a bit of oil or ghee. Yogurt is a magic ingredient; its acidity tenderizes the gluten, creating a soft, pliable dough with a subtle tang. Milk can also be used to add richness and create a softer crumb.
The Art of a Soft, Pliable Dough
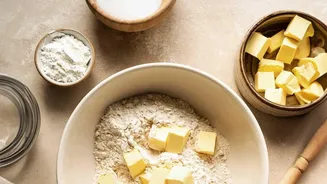
The goal is a soft, slightly sticky dough; a stiff or dry dough will lead to a tough naan. Start by combining your dry ingredients—flour, salt, sugar, and baking powder/soda—in a large bowl. In a separate bowl, whisk together the wet ingredients, such as yogurt, warm milk or water, and oil. Combining wet ingredients first helps ensure everything is evenly distributed. Gradually add the wet mixture to the dry, mixing until a shaggy dough forms. Now comes the kneading. Turn the dough onto a lightly floured surface and knead for about 5 to 10 minutes. You want to develop just enough gluten for that characteristic chewiness, but over-kneading can make it tough. The final dough should be smooth, soft, and elastic. If it's too sticky, add flour one tablespoon at a time; if too dry, add a splash of warm water or milk.
The Crucial Resting Period
Patience is a virtue, especially when making naan dough. Once kneaded, place the dough in a lightly oiled bowl, cover it with a damp cloth or plastic wrap, and let it rest in a warm, draught-free spot. This resting period is non-negotiable. It allows the gluten strands to relax, which makes the dough much easier to roll out later. If you've used yeast, this is when the fermentation happens, creating the gas bubbles that make the naan light and airy. For recipes using baking powder and soda, the rest allows the chemical leaveners to begin their work. A minimum of 30-60 minutes is recommended for a non-yeast dough, while a yeast-based dough may need 1-2 hours, or until it has doubled in size. Don't rush this step; a well-rested dough is the key to a tender, fluffy naan.
Infusing the Garlic Flavour
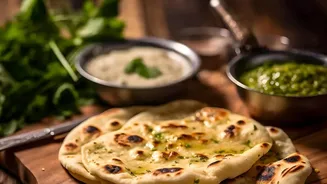
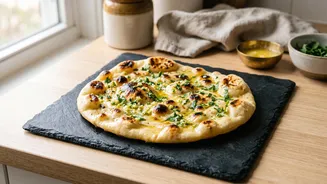
For a truly aromatic garlic naan, the timing and method of adding the garlic matter. Some recipes call for mixing finely minced or pureed garlic directly into the dough along with the other wet ingredients. This infuses the entire bread with a deep, savoury flavour. Alternatively, you can incorporate the garlic after the dough has been rolled out. Just before cooking, sprinkle freshly minced garlic and chopped coriander over the surface of the rolled dough and gently press it in with your hands or a rolling pin. This method provides a more pronounced, fresh garlic bite. For the ultimate garlic experience, you can do both. A popular finishing touch is to brush the hot, cooked naan with a mixture of melted butter or ghee and more minced garlic and herbs. This adds a final layer of richness and flavour that makes the naan irresistible.
Mastering the Tawa Technique
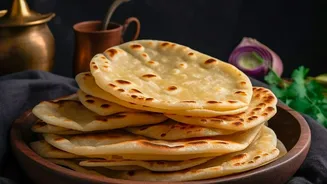
Cooking naan on a tawa (a flat or slightly concave iron griddle) is a technique designed to replicate the intense, uneven heat of a tandoor. A heavy-bottomed cast-iron tawa is essential; non-stick pans will not work for this method as the naan needs to stick to the surface. Preheat your tawa over medium-high heat until it is scorching hot. Roll your dough into an oval shape. Apply a thin layer of water to one side of the naan—this is the side that will go onto the tawa. Place the naan, wet-side down, onto the hot, dry tawa and press gently. You will see bubbles start to form on the surface within a minute or so. Once the top is bubbly, the magic happens. Using an oven mitt, firmly grip the tawa handle and invert it directly over the gas flame, about 3-4 inches above the burner. This direct heat chars the top and creates those signature dark blisters. Keep moving the tawa to cook it evenly. Once cooked, remove the naan with tongs and brush generously with butter or garlic butter.