






What Exactly Is Wire Art?
Wire art is a form of sculpture where the primary material is wire. Think of it as drawing in three dimensions. Artists and hobbyists bend, twist, and connect wire to create everything from delicate jewelry and simple figurines to complex, large-scale
installations. The art form was popularised in the 20th century by artists like Alexander Calder, who created whimsical, moving sculptures called mobiles. Today, it’s an accessible craft for anyone looking to make something beautiful with their hands. The focus is on line, form, and negative space, allowing for the creation of lightweight, airy pieces that can seem to float. It’s a versatile medium that can be as simple or as intricate as you want it to be.
The Joy of a Tidy Workspace
The central appeal for many newcomers is its cleanliness. Unlike painting, pottery, or scrapbooking, wire art involves no liquids, powders, or adhesives. There are no brushes to wash, no stained surfaces to scrub, and no glitter that will haunt your home for years. Your entire workspace consists of a spool of wire and a few hand tools. The only byproduct is the occasional scrap of wire, which can be easily collected and discarded or even saved for smaller projects. This makes it the perfect creative outlet for those living in small spaces or anyone who simply values a tidy environment. You can work on your project at the kitchen table and, once you're done, pack it all away in seconds, leaving no trace behind.
Your Essential Starter Kit
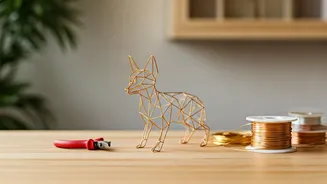
Getting started with wire art is remarkably affordable and requires only a few basic tools. You don’t need a dedicated studio or expensive equipment. Most of what you’ll need can be found at a local hardware or craft store. Here’s a simple list to get you going: Wire Cutters: Essential for getting clean cuts. A pair from a toolbox will work just fine. Needle-Nose Pliers: These are crucial for gripping, bending sharp angles, and twisting wire with precision. Round-Nose Pliers: Their conical jaws are perfect for creating smooth curves, loops, and coils without crimping the wire. That's it. While you can expand your toolkit later, these three items are all you truly need to begin your journey.
Choosing the Right Wire
The wire itself is, of course, the star of the show. Walking into a craft or hardware store, you'll find a variety of materials and thicknesses, which are measured in gauges—the higher the gauge number, the thinner the wire. For beginners, it's best to start with a wire that's soft and easy to manipulate. Aluminum Craft Wire: This is an excellent choice for starting out. It’s lightweight, soft, holds its shape well, and is available in many colours. Copper Wire: Slightly firmer than aluminum, copper is still very flexible and has a beautiful, warm tone that can be polished or allowed to develop a natural patina. Gauge: A good starting point for most small sculptures is a medium-thickness wire, such as 16 or 18 gauge. For more delicate details or weaving, a thinner wire like 22 or 24 gauge is ideal.
Simple First Projects to Build Confidence
The best way to learn is by doing. Start with simple projects that help you get a feel for how the wire behaves. You can find inspiration from line drawings or simple silhouettes. Some great beginner ideas include: Word Art: Bend wire to spell out your name or an inspiring word in cursive. This is a great way to practice flowing curves. Simple Shapes: Create hearts, stars, or spirals. These can be turned into ornaments, pendants, or decorations. Minimalist Figures: Try making a simple stick figure or a basic animal silhouette, like a cat or a bird. You can often follow a simple drawing as a template. Plant Stakes: A decorative spiral or shape on the end of a straight wire can add a personal touch to your indoor plants.