



The Foundation: A Soft, Pliable Dough
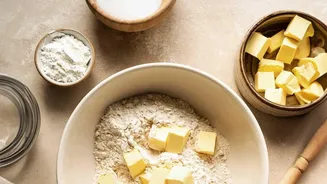
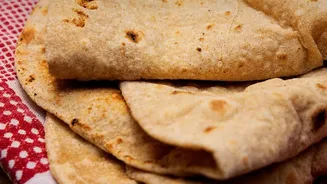
The secret to exceptional naan lies in its dough. Unlike a simple roti, naan dough is enriched to give it that characteristic soft and slightly chewy texture. The key ingredients are all-purpose flour (maida), a leavening agent, salt, a touch of sugar,
and the most important element for tenderness: yogurt (dahi). The yogurt's acidity tenderises the gluten, ensuring the final product is supple and not tough. You can use either active dry yeast or a combination of baking powder and baking soda as your leavener. If using yeast, you'll activate it in warm water with sugar until frothy. For a quicker, no-yeast version, simply mix baking powder and soda with the flour. Combine your dry ingredients, then mix in the yogurt, a little oil or melted butter, and enough lukewarm water or milk to form a soft, slightly sticky dough. Knead for about 8-10 minutes until it becomes smooth and elastic.
The Importance of Resting
Patience is a virtue, especially in bread making. Once your dough is kneaded, it needs to rest. This step, known as proofing, is non-negotiable for achieving a light and airy naan. Place the dough in a lightly oiled bowl, cover it with a damp cloth or plastic wrap, and let it sit in a warm, draught-free place. If you've used yeast, the dough should be allowed to rest for one to two hours, or until it has doubled in size. For a no-yeast dough made with baking powder and soda, a shorter resting period of 30 to 60 minutes is usually sufficient. This resting period allows the gluten to relax and the leavening agents to work their magic, creating the gas bubbles that will puff up into beautiful air pockets as the naan cooks. Don't skip this step; it is the difference between a dense, heavy flatbread and a perfectly puffy naan.
Shaping and Flavouring Your Naan
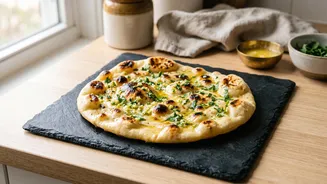
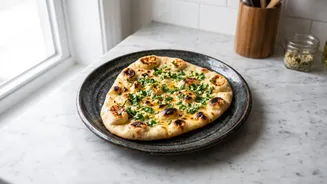
Once rested, gently punch down the dough and divide it into equal-sized balls. On a lightly floured surface, begin to roll each ball into the classic teardrop or oval shape, about a quarter-inch thick. Be careful not to roll it too thin, as a slightly thicker naan will be softer and fluffier. Now comes the flavour. For that signature garlic and coriander kick, sprinkle a generous amount of finely chopped garlic and fresh coriander leaves over the rolled-out dough. Some recipes also call for nigella seeds (kalonji) for an extra layer of aroma. Gently press the toppings into the surface with your rolling pin one last time to ensure they stick during the cooking process.
Mastering the Tawa Technique
Here's where we replicate the intense heat of a tandoor using a simple tawa. An iron or cast-iron tawa is highly recommended as it retains heat well and its surface helps the naan stick. Do not use a non-stick pan. Heat your tawa over medium-high heat until it's very hot. To prepare the naan for cooking, flip it over so the topping-free side is facing up. Brush this plain side liberally with water. Carefully place the naan, water-side down, onto the hot tawa. The water will help it adhere to the pan. Cook for about a minute or two, until you see bubbles starting to form all over the surface. This indicates the bottom is cooking and steam is building inside.
The Final Flip for a Perfect Char
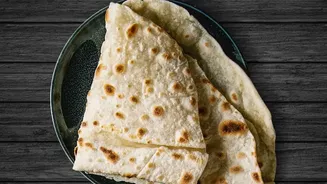
To get those iconic charred spots, you'll cook the top of the naan over a direct flame. Once bubbles have appeared, firmly grip the handle of the tawa and flip it completely upside down, holding it a few inches above the gas flame. Because the naan is stuck to the tawa, it won't fall off. Move the inverted tawa around to expose the entire surface of the naan to the direct heat. Cook for 30 to 60 seconds, or until you see beautiful golden-brown and slightly blackened blisters form. This direct-heat method mimics the effect of a tandoor and is key to the naan's authentic flavour and texture. If you have an electric stove, you can achieve a similar, though less charred, result by simply flipping the naan on the tawa and cooking the other side.
The Finishing Touch
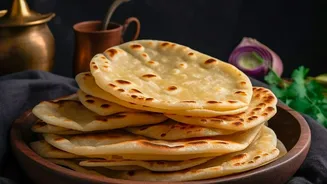
As soon as you remove the naan from the tawa, don't hesitate. Immediately and generously brush the hot surface with melted butter or ghee. You can use plain butter or infuse it with more minced garlic for an extra punch of flavour. This final step is crucial; it not only adds a wonderful richness but also locks in moisture, ensuring your homemade naan stays soft and delicious until it's ready to be served. To keep them warm while you cook the rest of the batch, stack the finished naans and cover them with a clean kitchen towel. Serve them hot and enjoy the satisfaction of tearing into a perfect, homemade garlic naan.