

The Science of a Split Curry
Before diving into the solutions, it helps to understand why curd (dahi or yogurt) splits in the first place. Curd is a delicate emulsion of milk proteins (casein), fat, and water. When exposed to high heat or a sudden temperature change, these protein networks
tighten and clump together, squeezing out the liquid whey. The result is a grainy texture with pale specks of protein floating in a thin, watery liquid. Acidity from ingredients like tomatoes or lemon juice can also destabilize the proteins, making them even more likely to curdle. The goal, therefore, is to introduce the curd to the hot, often acidic environment of a curry base gently and with some protection.
Technique 1: Control the Temperature
The most common culprit behind split curd is 'thermal shock'—adding cold dahi straight from the fridge into a sizzling hot pan. This drastic temperature difference causes the proteins to seize up instantly. To avoid this, always use curd that is at room temperature. Before adding it to your gravy, turn the flame down to its lowest setting or even switch it off completely for a minute. The curry base should be warm, not boiling furiously. This gentle introduction gives the proteins time to adjust without breaking apart.
Technique 2: Whisk and Smooth
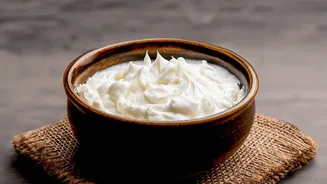
Never add lumpy curd directly to your dish. Lumps are harder to incorporate evenly, meaning parts of the curd will overheat while you’re still trying to stir them in. Before you begin, take the required amount of curd in a separate bowl and whisk it vigorously until it is completely smooth and uniform in texture. This breaks up the protein clusters and ensures the curd mixes into the gravy seamlessly, reducing the chances of separation. Continuous stirring is key once the curd is in the pan to maintain a consistent temperature throughout the sauce.
Technique 3: The Tempering Trick
Tempering is a professional technique that gradually acclimatizes the curd to the heat. Once your curd is whisked smooth in a bowl, take a ladle or a few spoonfuls of the hot curry liquid and add it to the bowl of curd. Stir this mixture well. The hot gravy will gently warm the curd and thin it out, preparing it for its entry into the main pot. Repeat this once or twice before slowly pouring the tempered curd mixture back into the pan, stirring constantly as you do. This is one of the most reliable methods for preventing a split.
Technique 4: Stabilise with Starch
For extra insurance, especially in dishes that require longer cooking after adding dahi, a stabiliser can work wonders. Adding a small amount of flour or starch to the curd before it goes into the pan helps prevent the proteins from clumping together. Whisk one or two teaspoons of besan (gram flour), cornstarch, or even plain maida into your curd until it's perfectly smooth. This starchy buffer protects the protein structure from the direct impact of heat and acidity, resulting in a stable, creamy gravy. Many traditional recipes, like kadhi, have this principle built into their method.
Other Key Considerations
The type of curd you use also matters. Full-fat curd is more stable than low-fat or non-fat versions because the higher fat content helps coat and protect the proteins from tightening up. Also, be mindful of when you add salt. Adding salt too early can encourage curdling; it's often best to season the dish after the curd has been fully incorporated and the gravy has gently come up to temperature. By combining these techniques—using full-fat, room-temperature curd, whisking it smooth, tempering it, and controlling the heat—you can confidently prepare a range of classic Indian dishes, from a rich Korma to a tangy Dahi Aloo, with a perfectly smooth and luscious gravy every time.