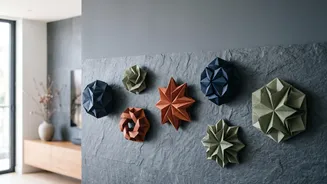









Transforming a blank wall into a personal statement piece can be as simple as folding paper. Origami wall art offers a unique, handmade touch to any room. Here’s what you need to know to arrange your delicate creations into a stunning display.
Choosing the Right Paper and Models
The foundation
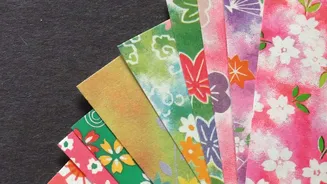
of beautiful origami wall art begins with your choice of paper. For pieces intended for display, it's wise to select high-quality, acid-free paper to prevent yellowing over time. Papers with a higher GSM (grams per square meter) are thicker and more durable, which helps models hold their shape. Brands like Tant are renowned for their versatility, offering a stiff, textured finish that works for both simple and complex folds. Washi and Chiyogami papers bring traditional Japanese patterns and textures, perfect for decorative pieces. When selecting models, consider the overall theme. Simple, geometric shapes can create a modern, minimalist look, while a collection of folded birds, flowers, or leaves can evoke a sense of nature. Think about how the complexity of the fold will read from a distance; sometimes simpler models arranged in a compelling pattern have a stronger visual impact.
Planning Your Layout and Design
Before a single piece is attached to the wall, planning your arrangement is crucial. Start by laying your folded origami on the floor to experiment with different compositions. You could opt for a structured grid for a clean, orderly feel, or a more organic, free-flowing arrangement that seems to drift across the wall. Consider creating a color gradient or an ombre effect for a subtle yet captivating look. Another popular approach is to cluster the pieces to create a focal point, drawing the eye to a specific area of the room. Think about scale and balance. A large wall might call for many small pieces grouped together or several larger, more dramatic models. Use painter's tape to lightly mark positions on the wall to visualize the final layout before committing.
Secure and Damage-Free Mounting
How you hang your origami is just as important as how you fold it. For a temporary or damage-free option, removable double-sided tape or mounting putty are excellent choices for lightweight paper models. For a more permanent and professional display, consider mounting the origami onto a backing board or canvas. You can use PVA glue to affix the pieces to the board, which can then be hung like a traditional piece of art. For 3D models, a shadow box is an ideal solution. It not only provides a beautiful frame but also protects the delicate paper from dust and damage. If you choose to frame your art, using a mat can create visual breathing room and prevent the paper from touching the glass, which is important for preservation. Spacers hidden under the frame's edge can also achieve this separation for a cleaner, modern look.
Protecting Your Paper Creations
Paper is a delicate medium, susceptible to environmental factors. To ensure your origami wall art lasts, placement is key. Avoid hanging your pieces in direct sunlight, as UV rays can cause colors to fade and the paper to become brittle over time. If a sunny spot is unavoidable, using UV-protective glass in your frame is highly recommended. Humidity is another enemy of paper, causing it to warp and lose its crisp folds. Therefore, it's best to avoid displaying origami in bathrooms or kitchens. For light dusting, a soft, dry paintbrush is perfect for gently cleaning the intricate folds without causing damage. Some artists also apply a light coat of an archival spray fixative to help seal the paper and protect it from moisture and fading, but it's crucial to test it on a scrap piece first.