
Gathering Your Simple Supplies
The beauty of this project lies in its simplicity. You don’t need expensive or hard-to-find materials. Before you begin, gather these essential items: Empty Glass Bottles: Wine bottles are a popular choice due to their elegant shape, but any clear or colored
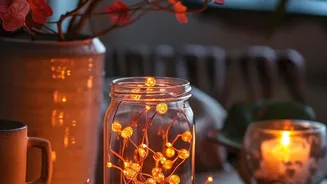
glass bottle will work beautifully. Let your creativity guide you. Fairy Lights: For the easiest and cleanest look, choose battery-operated fairy lights with the battery pack attached to a cork-shaped stopper. These are designed to fit perfectly into the neck of a standard bottle, eliminating the need to hide a separate battery pack. Warm white lights often create the coziest ambiance. * Cleaning Supplies: You’ll need hot water, dish soap, and baking soda to prepare your bottles. For stubborn label residue, some cooking oil can be a great help.
Step 1: Achieving a Spotless Sparkle
A clean bottle is the canvas for your creation, so this step is crucial for a polished final product. First, you need to remove the labels. The easiest method is to fill a sink or basin with hot, soapy water and add about half a cup of baking soda. Submerge the bottles and let them soak for at least 30 minutes. The hot water and baking soda work together to break down the adhesive, often allowing the label to slide right off. For any sticky glue that remains, create a paste using equal parts baking soda and cooking oil. Apply it to the residue, let it sit for about 10 minutes, and then scrub it away. Once the outside is clean, wash the inside of the bottle with hot, soapy water and a bottle brush, then rinse thoroughly and let it dry completely.
Step 2: Adding the Magical Glow
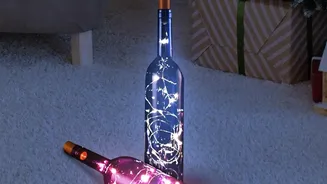
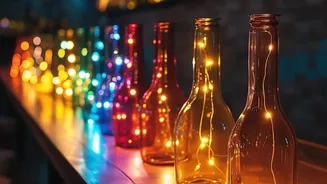
This is where your bottle begins its transformation. Take your strand of fairy lights and gently begin to feed it into the opening of the clean, dry bottle. There’s no perfect technique here; some people prefer to bunch the lights for a concentrated glow, while others like to carefully guide the wire so it spreads out more evenly. If you are using cork-style lights, this step is incredibly simple. Just push the light string in, leaving the cork stopper at the top. Once all the lights are inside, press the cork into the bottle's opening to secure it. Flick the switch on the cork, and watch your bottle light up.
Step 3: Styling Your New Creation
Now that you’ve created your glowing decor, it’s time to find the perfect spot for it. These bottles are incredibly versatile. Place a single bottle on a bedside table for a soft reading light, or group several together on a mantlepiece or bookshelf to create a stunning visual display. They also make a beautiful, ambient centerpiece for a dinner table, adding a touch of magic to any meal. You can arrange them on a windowsill to catch the evening light or use them to brighten up a dark corner of a room. Because they are battery-operated, you aren't limited by proximity to an outlet, giving you complete creative freedom.
Creative Ideas to Try Next
Once you’ve mastered the basic technique, you can start experimenting with more creative variations. Try using bottles of different colors—green, blue, and amber glass all produce unique effects when lit from within. For a softer, more diffused glow, you can apply a coat of frosted glass spray paint to the bottle before adding the lights. Another idea is to decorate the outside of the bottle. You can paint designs with glass paint, wrap the neck with rustic twine or elegant ribbon, or use Mod Podge to apply decorative napkins or pressed leaves. These personal touches will make your upcycled creation truly one-of-a-kind.