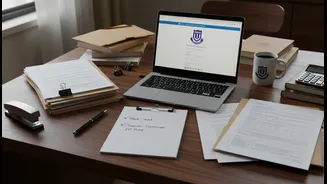









Phase 1: Your Document Arsenal
Before counselling even begins, your first task is to get all your paperwork in order. This is non-negotiable and can prevent last-minute panic. Create a master folder with originals and at least three sets of self-attested photocopies of every document.
The essentials include your Class 10 and Class 12 mark sheets and passing certificates. The Class 10 certificate is crucial as it serves as proof of your date of birth. Also, keep your admit card and scorecard from the relevant entrance exam (like CUET, NEET, or JEE) ready. You will need several recent passport-sized photographs, a government-issued photo ID like an Aadhaar card, and your school leaving or transfer certificate. One of the most common mistakes is a mismatch in names across documents; ensure your name is spelled identically on all certificates, or get a notarised affidavit to address any discrepancies.
Phase 2: Category and Quota Documents
If you are applying under a reserved category, this step is critical. Ensure your certificates are valid and in the correct format as specified by the university. This includes SC, ST, OBC (Non-Creamy Layer), and EWS certificates. For OBC-NCL and EWS certificates, the issue date is very important; they must typically be issued after a specific date (e.g., March 31 of the admission year) to be considered valid for the current session. If you are applying under special quotas like Persons with Disabilities (PwD), Children/Widows of Armed Forces Personnel (CW), or for a state-specific domicile, have those original certificates ready. Getting these documents can take time, so it's wise to apply for renewals or new certificates well in advance of counselling dates.
Phase 3: The Online Registration and Choice Filling
Once counselling portals like Delhi University's CSAS open, you'll need to register. This involves filling in personal details, academic scores, and uploading scanned copies of your documents. Keep digital copies of all your paperwork ready in a designated folder on your computer. After successful registration, the most crucial part is choice filling. This is where you list your preferred course and college combinations. A common error is filling too few choices. Be ambitious with your top choices, but also be realistic and include plenty of safer options to ensure you get an allotment. Research colleges and courses thoroughly beforehand instead of just following trends or friends. Once you lock your choices, you cannot change them, so be deliberate and careful.
Phase 4: After the Allotment
Once a seat is allocated, the clock starts ticking. You will typically have a very short window—often just 48-72 hours—to accept the seat online and pay the acceptance fee. Missing this deadline means you forfeit the seat and may be excluded from subsequent rounds. After paying the fee, you will receive a provisional allotment letter; download and print this immediately. The next step is document verification, which may happen online or require a physical visit to the allotted college. Be prepared for either scenario. Keep your master document folder handy. If verification is at the college, be there on the scheduled date and time with all originals and photocopies.
Phase 5: The Final Admission
After successful document verification, the college will approve your admission on the university portal. You will then be required to pay the final admission fee for the first semester or year. Once this payment is confirmed, your seat is secured. Keep a record of all fee receipts and confirmation pages. Some universities also require students to submit anti-ragging undertakings, which may need to be signed by both the student and a parent. Remember to collect your migration certificate from your school board, as this is often required, especially for students who have passed their qualifying examination from outside Delhi. Staying organised throughout this process will significantly reduce stress and help you focus on the excitement of starting your college journey.