




What Exactly is Ragi?
Before diving into the recipe, let's talk about the star ingredient. Ragi, also known as finger millet, is a gluten-free ancient grain that has been a staple in parts of India, particularly in the south, for centuries. This tiny, reddish-brown seed is a nutritional
powerhouse, celebrated for its resilience as a crop and its immense health benefits. Often ground into a fine flour, it's used to make everything from rotis and dosas to the now-famous porridge. Its slightly nutty, earthy flavour makes it a versatile base for both sweet and savoury dishes, but it truly shines in a warm, comforting bowl of porridge.
The Nutrition Behind the Trend
So, why the sudden surge in popularity? The answer lies in its incredible nutritional profile, which aligns perfectly with modern wellness goals. Ragi is one of the best non-dairy sources of calcium, essential for bone health. It's also packed with iron, making it an excellent food for preventing anaemia. The high dietary fibre content aids in digestion, promotes a feeling of fullness, and helps manage blood sugar levels, making it a diabetic-friendly grain. Furthermore, it's rich in antioxidants and amino acids that contribute to overall well-being. This impressive combination of benefits is what has catapulted ragi from a traditional staple to a viral superfood.
The Viral Rich Ragi Porridge Recipe
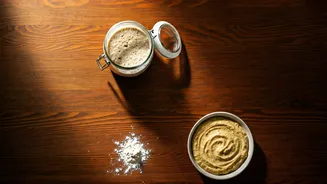
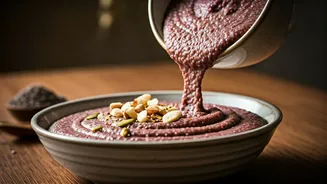
This version is all about creating a luxuriously smooth and flavourful porridge. Forget the lumpy, bland versions of the past; this recipe yields a creamy, satisfying breakfast that feels like an indulgence. **Ingredients:** - 1/4 cup ragi flour (finger millet flour) - 1.5 cups water, divided - 1 cup milk (dairy or plant-based like almond or oat milk) - 2 to 3 tablespoons jaggery powder or chopped dates, to taste - 1/4 teaspoon cardamom powder (elaichi) - A pinch of salt - 1 teaspoon ghee or coconut oil (optional, for richness) **Instructions:** 1. **Make the Slurry:** In a small bowl, combine the ragi flour with 1/2 cup of water. Whisk vigorously until you have a smooth, lump-free paste. This is the most crucial step to ensure a creamy texture. 2. **Cook the Base:** In a saucepan, bring the remaining 1 cup of water to a boil. Once boiling, reduce the heat to low and slowly pour in the ragi slurry, whisking continuously to prevent lumps from forming. 3. **Thicken the Porridge:** Continue to cook on low heat for 3-4 minutes, stirring constantly as the mixture thickens. You'll know it's cooked when the raw smell of the flour is gone and it has a glossy appearance. 4. **Add Creaminess and Flavour:** Pour in the milk and continue to cook for another 2-3 minutes until the porridge reaches your desired consistency. Stir in the jaggery powder or dates, cardamom powder, and a pinch of salt. Mix until the sweetener is fully dissolved. 5. **Finishing Touch:** For extra richness, stir in a teaspoon of ghee or coconut oil right at the end. Serve hot.
Tips for Perfect Porridge Every Time
Getting this porridge right is easy if you keep a few things in mind. The number one rule is to always make a slurry with cold or room temperature water before adding the flour to hot liquid. Dumping ragi flour directly into hot water is a guaranteed recipe for lumps. Secondly, don't stop stirring, especially in the initial stages of cooking. Ragi thickens quickly and can stick to the bottom of the pan. Finally, adjust the liquid to your preference. If you like a thinner porridge, add a little more milk or water at the end. The porridge will also continue to thicken as it cools.
Customise Your Bowl
The beauty of this porridge lies in its versatility. The basic recipe is a canvas for countless toppings and flavour variations. Here are a few ideas to get you started: - **Nuts and Seeds:** Add a nutritional crunch with toasted almonds, walnuts, pumpkin seeds, or chia seeds. - **Fresh Fruit:** Top with sliced bananas, fresh berries, or chopped mango for natural sweetness and vitamins. - **Spices:** A pinch of cinnamon or nutmeg can add another layer of warmth and flavour. - **Protein Boost:** Stir in a spoonful of nut butter or a scoop of your favourite protein powder after cooking for an even more filling meal.