


More Than a Snack, A Ritual
In the hierarchy of comfort foods, momos hold a special place. They are not a quick fix. They demand time, patience, and a bit of artistry. This is precisely why they are the perfect weekend cooking project. Unlike a 30-minute meal, making momos is a process
to be savoured. It’s an invitation to slow down, to focus on the tactile sensations of chopping, kneading, and folding. It’s an activity that can be done solo as a form of meditation, or with family and friends, turning your kitchen into a lively workshop where everyone gets a role. The reward isn't just the delicious, steaming plate at the end; it's the satisfaction of creating something beautiful and intricate with your own hands.
The Prep Station: Mise en Place
A successful momo project begins with organisation. ‘Mise en place’ is a French term for having all your ingredients prepped and ready to go, and for momos, it’s non-negotiable. Start with the vegetables. The classic filling is a finely chopped mix of cabbage, carrots, and onions. Some add finely minced French beans, mushrooms, or paneer for extra texture and flavour. The key is uniformity—aim for a mince-like consistency so the filling is delicate and cooks evenly. You’ll also need your aromatics: finely grated ginger, minced garlic, and perhaps a green chilli for heat. Squeeze out excess water from the cabbage and onions after chopping to prevent the filling from becoming soggy. Having these little bowls of colourful, prepped ingredients ready on your counter is the first step towards feeling like a pro.
Crafting the Perfect Filling
The soul of a veg momo is its filling. Once your vegetables are prepped, it’s time to bring them together. In a pan, heat a little neutral oil and sauté the ginger, garlic, and green chillies until fragrant. Add the onions and cook for a minute before adding the rest of your hard vegetables like carrots and beans. Finally, add the cabbage and cook for just a couple of minutes. You don’t want to turn them to mush; the goal is to soften them slightly while retaining a subtle crunch. Season with a splash of soy sauce, a pinch of sugar to balance the flavours, and a generous dash of white or black pepper. Take it off the heat and let the mixture cool down completely. A hot filling will tear the delicate dough, so this step requires patience.
Mastering the Dough
Momo wrappers are deceptively simple but require the right technique. The dough is typically made from just two ingredients: maida (all-purpose flour) and water. For a slightly healthier and chewier wrapper, you can use a mix of maida and whole wheat flour (atta). Start by mixing the flour with a pinch of salt. Then, add lukewarm water a little at a time, mixing until a shaggy dough forms. Transfer it to a clean surface and knead for a good 8-10 minutes. The goal is a dough that is smooth, firm, and elastic. It shouldn't be sticky. Once kneaded, cover the dough with a damp cloth and let it rest for at least 30 minutes. This resting period is crucial; it allows the gluten to relax, making the dough pliable and much easier to roll out thinly.
The Art of the Fold
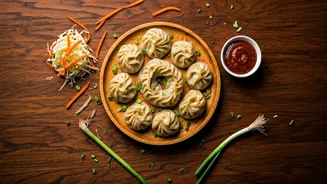
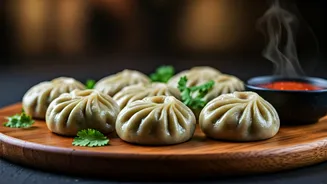
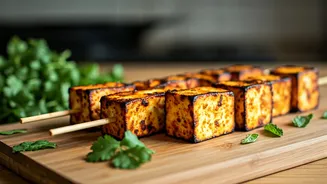
This is where the 'project' becomes art. Don’t be intimidated by the intricate folds you see in restaurants. The only real goal is to create a secure parcel that holds the filling. Start by rolling your dough into a thin, large circle and using a cookie cutter for uniform rounds, or by dividing the dough into small, equal-sized balls and rolling each one out into a small circle (about 3 inches in diameter). The edges should be thinner than the centre. Place a small spoonful of filling in the middle. For a simple and classic fold, create a half-moon (like a gujiya), pinching the edges firmly to seal. To get fancier, you can pleat one side of the half-moon as you seal it. Remember, they don't need to be perfect, just sealed. Your 10th momo will look better than your first, and that’s part of the fun.
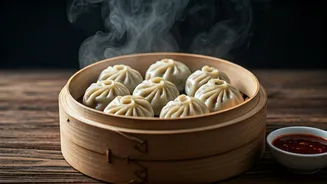
The Final Steam
The final step is a steamy bath that transforms your little parcels into translucent, juicy dumplings. If you have a bamboo or metal steamer, lightly grease the surface with oil to prevent sticking. Arrange the momos with a little space between them, as they will expand slightly. If you don't have a steamer, improvise! Place a metal colander or a large sieve over a pot with a few inches of boiling water, making sure the water doesn't touch the bottom of the colander. Cover with a tight-fitting lid and steam for 10-12 minutes. You'll know they are ready when the wrappers look shiny and translucent, not dry and floury. The aroma that fills your kitchen at this point is your delicious reward.