


The Genius of the Humble Fryum
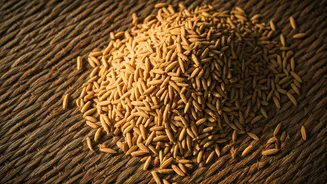
In kitchens across India, nothing goes to waste. This philosophy is perfectly embodied by Sandige, vathal, or what many call fryums. These crunchy, airy snacks, which puff up dramatically in hot oil, are traditionally made by creating a batter from rice
or sago, which is then painstakingly piped and sun-dried over several days. They are a testament to our grandmothers' ingenuity, preserving a staple food as a delicious, shelf-stable treat for rainy days.But in our fast-paced lives, who has days to spare for sun-drying? The good news is you don’t have to. This modern method bypasses the lengthy traditional process, using a common kitchen appliance to achieve that perfect, fry-able crispness ‘instantly’. It’s the ultimate kitchen hack: honouring tradition with a touch of modern convenience while ensuring not a single grain of rice is wasted.
Gather Your Simple Ingredients
The beauty of this recipe lies in its simplicity. You likely have everything you need in your pantry already. There's no need for exact measurements as it’s a very forgiving recipe, but here is a general guide to get you started:* **Leftover Cooked Rice:** About 1 cup. Any variety of plain white rice works, whether it's Sona Masuri, basmati, or kolam. Just ensure it's not a flavoured rice like biryani or pulao.* **Water:** As needed, to help with blending.* **Salt:** To taste.* **Spices:** This is where you can get creative. The classics include:* 1/2 teaspoon Cumin seeds (jeera)* 1/2 teaspoon Red chili powder or a few chopped green chillies* A generous pinch of Asafoetida (hing) - this is key for that authentic flavour and aids digestion.* **Oil:** For greasing the plate and for deep-frying later.
Step 1: Blend to a Smooth Batter
The first step is to transform your cooked rice into a smooth, pipeable batter. Place the leftover rice into a blender or mixer grinder. Add a little water—start with just a tablespoon or two—to help it move. The goal is to use as little water as possible while still achieving a very smooth, thick paste. The final consistency should be similar to that of a thick idli or dosa batter. If you add too much water, the batter will be runny and difficult to shape, and it will take longer to dry. Blend in short bursts, scraping down the sides of the jar, until there are no visible grains of rice left. You want it completely uniform and silky.
Step 2: Spice It Up
Transfer the smooth rice paste to a mixing bowl. Now it's time to infuse it with flavour. Add your salt, cumin seeds, asafoetida, and red chili powder or green chillies. Mix everything together thoroughly with a spoon or spatula. The cumin seeds will not only add flavour but also a lovely texture to the finished fryums. Give the batter a small taste to check for salt and adjust if necessary. Remember that the flavour will concentrate as the fryums dry, so don't go overboard with the salt.
Step 3: Shape Your Sandige
Lightly grease a microwave-safe plate, a sheet of parchment paper, or a silicone mat. This will prevent the batter from sticking. You can now shape your Sandige. The easiest way is to use a piping bag (or a ziplock bag with a corner snipped off) to pipe small, coin-sized dollops onto the greased surface. You can also simply use a spoon to drop small portions. Keep them relatively small and uniform in size so they dry and fry evenly. Leave a little space between each dollop as they will spread slightly.
Step 4: The 'Instant' Drying Trick
Here’s where the magic happens. Place the plate of shaped Sandige into the microwave. Cook on high power for 1 minute. After the first minute, you'll notice them start to dry out. Now, continue to microwave in 30-second bursts. After each interval, check on them. They are done when they are completely dry, brittle, and lift off the plate easily. Depending on your microwave's power and the thickness of your Sandige, this can take anywhere from 2 to 4 minutes in total. Be careful not to burn them. Alternatively, you can bake them in a preheated oven at its lowest temperature setting (around 100°C) for 30-40 minutes or until fully dry, or use an air fryer on a low setting.
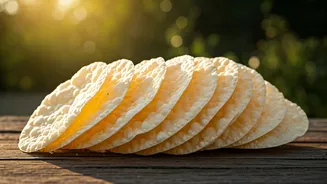
Step 5: Fry to Crispy Perfection
Once your Sandige are completely dry and hard, they are ready to be stored or fried. You can keep them in an airtight container for several weeks. To enjoy them, heat some oil in a kadai or deep pan. The oil should be hot but not smoking. To test if it's ready, drop a small piece in; it should sizzle and puff up immediately. Carefully drop a few dried Sandige into the hot oil. In just a few seconds, they will expand dramatically and turn white and crispy. Use a slotted spoon to remove them quickly before they brown, and place them on a paper towel to drain any excess oil. Serve them hot as a snack or as a crunchy accompaniment to your meal.