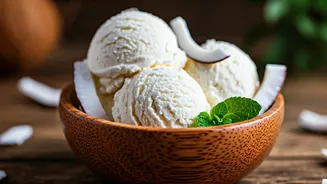


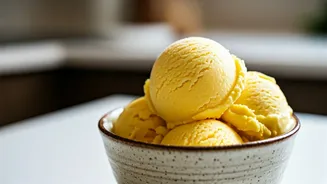
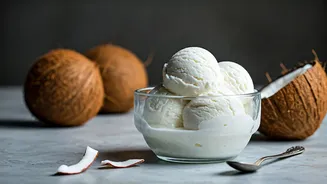


Why Is This Ice Cream a Viral Hit?
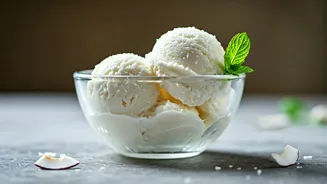
The appeal of tender coconut ice cream lies in its simplicity and nostalgia. For many in India, the flavour of 'nariyal malai' is deeply connected to summer holidays and refreshing treats. This homemade version captures that authentic taste without any artificial
flavouring. The trend is fuelled by its photogenic nature and the ease of making it. Most viral recipes are no-churn, meaning you don't need a special ice cream machine. This accessibility has encouraged food bloggers and home cooks alike to share their creamy creations, often served in a coconut shell for that perfect Instagram shot. The result is a dessert that looks as good as it tastes—light, refreshing, and naturally sweet.
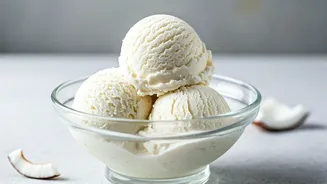
The Magic of Fresh Ingredients
Unlike store-bought ice creams that can have a synthetic coconut taste, this recipe's success hinges on using real, fresh tender coconut. The combination of the sweet, hydrating coconut water and the soft, delicate flesh (malai) creates a flavour and texture that is impossible to replicate with extracts. This dessert celebrates the ingredient in its purest form. The natural sweetness of the coconut means you need less added sugar, resulting in a lighter dessert that feels both indulgent and refreshing, making it the perfect antidote to the summer heat.
The Easiest 4-Ingredient Recipe
Ready to try it yourself? This popular no-churn version requires just a few basic ingredients that are likely already in your kitchen or easy to find. You will need: Tender Coconut Flesh (Malai): 1 cup, from about 1-2 tender coconuts. Condensed Milk: 1/2 cup, or adjust to your preferred sweetness. Fresh Cream or Heavy Whipping Cream: 1 cup, chilled. Tender Coconut Water: 2-3 tablespoons, to help with blending. That’s it. The magic of this recipe is its minimalism. Some variations might also use a splash of coconut milk for extra creaminess or a pinch of cardamom for a hint of spice.
Step-by-Step Guide to Creaminess
Making this ice cream is surprisingly straightforward. Follow these simple steps for a perfect, scoopable result: 1. Blend the Base: In a blender, combine the tender coconut flesh and coconut water. Blend until you have a smooth, fine paste. If you like texture in your ice cream, you can reserve some finely chopped malai to add in later. 2. Whip the Cream: In a separate, chilled bowl, whip the cold fresh cream until it forms soft peaks. This process incorporates air and is the key to a light, no-churn texture. 3. Combine Gently: Gently fold the condensed milk into the whipped cream with a spatula. Be careful not to overmix and deflate the cream. Once combined, fold in the tender coconut paste. If you reserved any chopped coconut pieces, now is the time to stir them in. 4. Freeze: Pour the final mixture into a freezer-safe, airtight container. To prevent ice crystals from forming, you can press a piece of plastic wrap or baking paper directly onto the surface of the ice cream before sealing the lid. Freeze for at least 6-8 hours, or overnight, until firm.
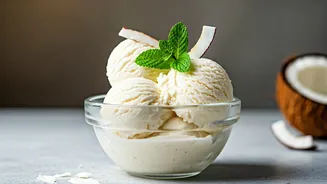
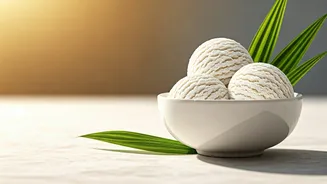
Tips for the Perfect Scoop
To ensure your homemade ice cream is a success, keep these tips in mind. Firstly, use fresh, high-quality ingredients; the flavour of the tender coconut is the star, so make sure it’s good. Secondly, ensure your cream and mixing bowl are well-chilled before whipping, as this helps it achieve the right volume and stability. When you’re ready to serve, let the container sit at room temperature for a few minutes. This will soften it just enough to make scooping easy, revealing the creamy, velvety texture you worked to create. You can garnish with toasted coconut flakes, chopped nuts, or fresh fruit for an extra layer of flavour and texture.