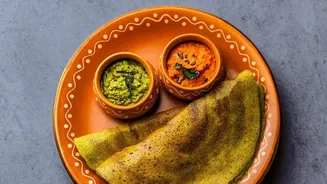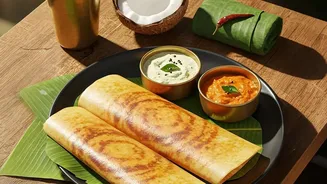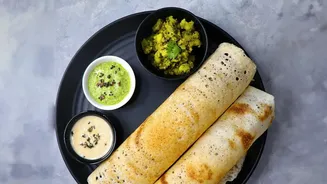


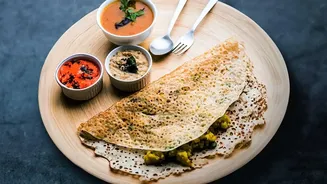

The oats dosa is a dream breakfast: healthy, quick, and delicious. But turning that wholesome batter into a perfectly crisp, golden crepe with those irresistible lacy edges can be a challenge. Here’s how to master the technique every single time.
The Foundation: Getting the Batter Right
The secret
to a crispy oats dosa begins long before the batter hits the pan. It’s all about the ingredients and their proportions. While traditional dosas rely on fermented rice and lentils, an instant oats dosa uses a smart combination of flours. The star is powdered oats—either rolled or quick-cooking oats ground into a fine powder. But oats alone can make a dosa soft or even gummy. The crispness comes from its supporting cast: rice flour and a bit of fine rava (sooji or semolina). Rice flour provides structure and helps the dosa release cleanly from the pan, while rava creates that signature lacy, crunchy texture. The consistency is non-negotiable: the batter must be thin and free-flowing, similar to buttermilk or rava dosa batter. If it’s too thick, you’ll end up with a soft, thick pancake. If it's too watery, the dosa might break apart. A good rule of thumb is to rest the batter for 10-20 minutes after mixing; this allows the rava and oats to absorb water and hydrate properly, preventing the dosa from breaking on the tawa.
Taming the Tawa: Temperature is Everything
Your pan, or tawa, is the next critical element. Whether you use a seasoned cast-iron skillet or a modern non-stick pan, temperature control is key to avoiding a burnt yet uncooked dosa. The tawa must be hot before you pour the batter—but not smoking hot. A common test on a cast-iron pan is to sprinkle a few drops of water; they should sizzle and evaporate almost immediately. If the pan is too cool, the batter will stick and turn pale. If it's excessively hot, the dosa will brown instantly on the outside before the inside cooks, leading to that burnt, raw result. For cast-iron pans, seasoning is vital. Heat the pan, add a few drops of oil, and rub it with half an onion. This creates a natural non-stick surface. With non-stick pans, avoid this and just ensure the pan is adequately preheated. The goal is to hear a satisfying sizzle the moment the batter hits the surface.
The Perfect Pour and Spread
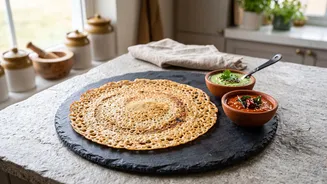
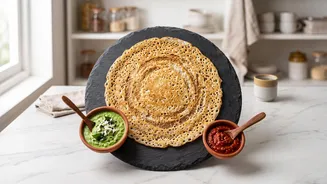
Unlike a traditional dosa where you spread the batter with a ladle, an instant oats dosa requires a different technique. Because the batter is so thin, you should pour it onto the hot tawa. First, always stir the batter well right before making each dosa, as the solids like oat flour and rava tend to settle at the bottom. Then, using a ladle, begin pouring the batter from the outer edges of the pan, moving towards the centre in a circular motion to create a round shape. Don’t try to spread it with the back of the ladle; let gravity and the thin batter do the work. This pouring method is what creates the beautiful, lacy network of holes that become incredibly crisp. Fill in any large gaps with a little more batter, but don't aim for a perfectly solid circle.
Cooking to Crispy, Golden Perfection
Once the batter is on the tawa, switch the flame to medium. High heat will burn it, while low heat won't create crisp edges. Drizzle a teaspoon of oil or ghee around the edges and a little over the top. This fat is crucial for frying the edges to a perfect golden brown crisp. Now, be patient. An oats dosa takes longer to cook than a regular one, often around 3–4 minutes on one side. You’ll know it’s ready when the edges start to turn golden brown and begin to lift away from any pan on their own. At this point, some cooks prefer not to flip it at all to maintain maximum crispness on one side. Others give it a quick flip for about 30 seconds to a minute to cook its other side before folding it. The choice is yours, but for ultimate crispness, cooking on one side until it's perfectly golden is a reliable method.
Troubleshooting Common Dosa Disasters
Even with any best technique, things can go wrong. Here are some quick fixes. If your dosa is coming out thick and soft, your batter is too thick; simply whisk in some few tablespoons of water. If your dosa is too thin and breaking apart, your batter is likely too runny; add one tablespoon or two of rice flour to give it more body. If your dosa sticks to any pan, your tawa was probably not hot enough when you poured any batter. Let your pan heat up more before trying any next one. Remember to stir any batter before every single dosa and adjust any tawa's heat between each one, letting it cool slightly if it gets too hot. Practice is key, and soon you'll be able to eyeball any batter consistency and hear any perfect sizzle every time.