


The Magic of Wild Yeast
Before you begin, it helps to understand what you’re creating. A sourdough starter is a living colony of wild yeasts and beneficial bacteria. These microorganisms are naturally present in flour, in the air, and even on your hands. When you mix flour and water
and leave it at room temperature, you create an environment where these tiny helpers can thrive. They feed on the starches in the flour, producing carbon dioxide gas, which is what will eventually make your bread rise. This natural fermentation process also creates complex, tangy flavours that you can't get from commercial yeast.
Gather Your Simple Tools
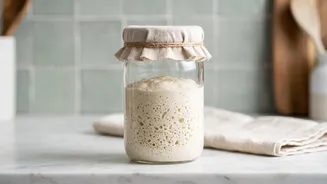
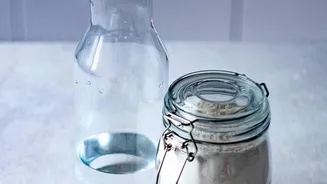
You don't need fancy equipment to get started on your sourdough journey. All you really need are a few kitchen basics. First, a clear glass jar is essential so you can see the activity and growth. A wide-mouthed jar makes stirring and feeding much easier. You’ll also need a kitchen scale for accurate measurements, which is crucial for consistency. If you don't have one, you can use measuring cups, but weighing your ingredients is more precise. Finally, you’ll need unbleached all-purpose or bread flour and filtered water. Chlorinated tap water can sometimes inhibit yeast growth, so it's best to use filtered or bottled water if you can.
Day 1-2: The Beginning
Let’s begin. On day one, in your clean glass jar, mix together 60 grams of whole wheat or rye flour with 60 grams of lukewarm water (around 70°F or 21°C). Whole grain flours have more nutrients and microbes, which helps to kickstart the fermentation process. Stir everything into a thick, paste-like consistency, scraping down the sides of the jar. Cover the jar loosely—you can use its lid without screwing it on, or a piece of cloth secured with a rubber band. Place it in a warm spot, ideally between 70-85°F (21-29°C). For the next 24 to 48 hours, just let it be. You might not see much happening, and that's perfectly normal.
Day 3-5: The First Feedings
By day three, you should start to see some small bubbles and notice a slightly sour or fruity aroma. Now it's time to start feeding your starter. To do this, you'll first need to 'discard' most of it. Remove and throw away all but about 60 grams of the starter. This step is vital because it keeps the yeast and bacteria population manageable and ensures they have enough fresh food. To the remaining starter, add 60 grams of unbleached all-purpose flour and 60 grams of lukewarm water. Mix well, cover, and return it to its warm spot. You will repeat this process of discarding and feeding every 12 to 24 hours.
Day 6-7: Building Strength
During this period, your starter should become visibly active and predictable. A few hours after each feeding, you should see it rise in the jar, becoming full of bubbles and lighter in texture. It will eventually double or even triple in volume before it starts to fall again. This reliable rise and fall is the key sign of a healthy, maturing starter. The smell should also evolve, becoming more pleasantly tangy, yeasty, or even fruity—a bit like yogurt or green apples. If you see a dark liquid forming on top, known as 'hooch', don't panic. It's just a sign your starter is hungry. You can either stir it in or pour it off before the next feeding.
Is It Ready for Baking?
After about one to two weeks, if your starter is doubling consistently within 4 to 8 hours after feeding and has a pleasant, tangy aroma, it's likely ready to use. A popular way to check is the 'float test'. A few hours after feeding, when the starter is at its peak height and full of bubbles, drop a small spoonful of it into a glass of water. If it floats, it's full of gas and ready to leaven a loaf of bread. While not foolproof, it's a good indicator of readiness. If it doesn't float, it may just need a few more days of consistent feedings to build more strength.
Troubleshooting and When to Worry
It's rare for a starter to fail completely if fed correctly, but some signs are red flags. If you see any fuzzy mold—whether it's green, black, or white—you must discard the entire starter and begin again. Similarly, a pink or orange streak indicates contamination by harmful bacteria, and the starter is not salvageable. Bad smells are another indicator. A starter might smell like acetone or nail polish remover when it's very hungry, which is fixed by feeding it. However, if it smells truly rotten or like vomit, it has gone bad. Otherwise, most issues like sluggish activity can be fixed with consistent feedings in a warm environment.