


Why a Simple Shelter Is a Lifeline
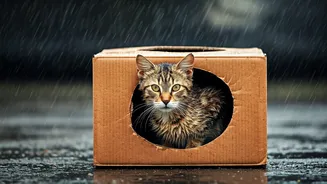
For a stray or feral cat, survival is a constant battle against the elements. Unlike domestic cats, they don't have a warm home to retreat to when the wind howls or the rain pours. Exposure is a leading cause of illness and death for these animals. A
well-placed, insulated shelter can mean the difference between a cat freezing and surviving the night. Even a basic structure provides a crucial barrier against wind, rain, and cold, allowing the cat to preserve its precious body heat. Creating a shelter is one of the most direct and impactful ways you can provide comfort and safety to the community cats who share our space.
Gathering Your Materials
The beauty of this project is its simplicity. You likely have most of the necessary materials already. The goal is to create a shelter that is both insulated and waterproof. Here’s what you’ll need: * **A sturdy cardboard box:** A medium-sized box, roughly two feet by three feet, is ideal. It needs to be large enough for a cat to turn around in but small enough to trap its body heat. * **A heavy-duty plastic garbage bag or plastic sheeting:** This is the key to waterproofing your cardboard structure. * **Duct tape or packing tape:** You’ll need plenty to secure the plastic and assemble the box. * **A box cutter or strong scissors:** For cutting a doorway. * **Insulation:** Straw is the absolute best choice. Avoid hay, which gets mouldy when wet. Also, avoid blankets or towels, as they absorb moisture and can freeze, making the cat colder.
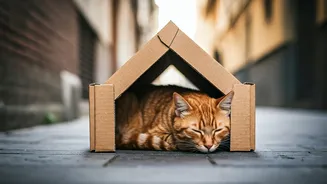
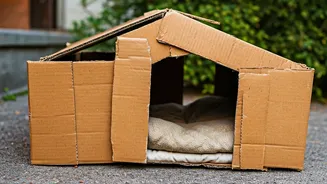
The Easy Shelter Blueprint: A Step-by-Step Guide
Let’s build a safe, warm haven. This simple design focuses on keeping the occupant dry and warm. 1. **Prepare the Box:** Start by taping all the seams of your cardboard box shut. You want to make it as airtight as possible to block wind. 2. **Waterproof the Exterior:** Carefully pull the large plastic garbage bag over the entire box, like you’re putting on a pillowcase. If using plastic sheeting, wrap the box completely, making sure to cover the bottom as well. Use your duct tape to generously seal all edges and seams. The goal is to leave no cardboard exposed to the elements. 3. **Cut the Doorway:** On one of the shorter sides of the box, carefully cut a small, circular doorway, about five to six inches in diameter. A small entrance prevents larger predators from getting in and keeps more heat inside. To prevent rain from getting in, try to cut the entrance several inches above the ground. 4. **Add an Awning (Optional):** Cut a simple flap from a piece of plastic or spare cardboard and tape it above the entrance to act as a small awning, which helps keep rain and snow from blowing inside.
The Importance of Proper Insulation
Once your structure is built, insulation is what makes it a truly warm refuge. Fill the bottom third of the shelter loosely with straw. Straw is a fantastic insulator because its hollow stalks trap warm air, and it repels moisture, meaning it won't get soggy and cold. The cat can burrow into the straw to create a warm nest. Again, it is critical to use straw, not hay. Hay is livestock feed; it absorbs moisture and quickly grows mould and mildew, which can make a cat sick. Blankets, towels, and newspaper should also be avoided for the same reason—they get wet and stay wet, leaching heat away from the animal's body.
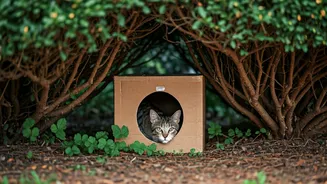
Strategic Placement for Maximum Safety
Where you place the shelter is just as important as how you build it. Cats will only use a shelter if they feel safe in it. Find a quiet, discreet location on your property. Good spots include under a deck, behind some bushes, or along the side of a shed. Face the entrance towards a wall to prevent wind and rain from blowing directly inside. If possible, raise the shelter off the cold ground by placing it on a couple of bricks or a wooden pallet. This prevents moisture from seeping in from below and adds an extra layer of insulation. Check on the shelter from a distance to see if it's being used, and change the straw periodically to keep it clean and dry.