



The Core Mission of a Label
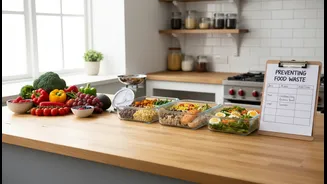
Before you grab a marker, understand why you're labeling. The goal is to eliminate guesswork and make decisions for your future self. Proper labels are your first line of defense against food waste, saving you money and time. By clearly tracking what
you have and when it was frozen, you can prioritize older items, prevent ingredients from getting lost in the icy depths, and ensure everything is consumed when its quality is best. An organized freezer makes meal planning and grocery shopping significantly easier, as you always have a clear inventory of what’s on hand.
The Three Essential Details
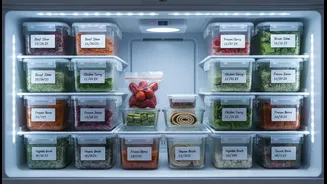
A truly useful freezer label needs to answer three key questions at a glance. Omitting any one of these can lead to confusion down the line. First is the name of the dish. Be specific—'Chicken Curry' is far more helpful than 'Curry' or 'Leftovers'. Second is the date it was frozen. This allows you to follow the 'First In, First Out' (FIFO) principle used in professional kitchens, ensuring you use older food first. Finally, consider adding a use-by date or quantity. Information like 'Serves 2' or 'Reheat at 180°C for 20 mins' can be incredibly helpful when you're in a rush.
Choosing Your Labeling Tools
You have several options when it comes to the physical labels and pens, each with pros and cons. The simplest method is masking tape and a permanent marker. It's cheap and surprisingly effective, as the adhesive on standard masking tape often holds well in the cold. For best results, use an oil-based permanent marker, which is less likely to fade or smudge in freezing temperatures than alcohol-based ones. For reusable containers, dissolvable labels that wash away in water are a game-changer, leaving no sticky residue. You can also find dedicated freezer-safe labels designed with adhesives that withstand extreme cold and moisture. Another option is to use a color-coding system—for instance, red for meat, green for vegetables, and yellow for poultry—to identify contents even faster.
Application for Maximum Stickiness
The biggest enemy of a freezer label is moisture. Most adhesives struggle to bond to cold, wet, or frosted surfaces. The key to making your labels last is to apply them to containers that are clean, dry, and at room temperature. Write on the label, let the ink dry for about 30 seconds, and then press it firmly onto the container before placing it in the freezer. This allows the adhesive to cure properly and form a strong bond. If you’re labeling a bag, you can write on it before filling it. For containers already in the freezer, it’s worth taking them out, wiping them dry, and letting them sit for a moment before applying the label. This extra step prevents the frustration of labels falling off.
Building a Sustainable System
A few labels are good, but a consistent system is what truly transforms your freezer. Once labeled, think about arrangement. Group similar items together in zones or dedicated bins: one for meats, one for vegetables, one for pre-made meals. This makes finding what you need much faster. Always place newer items at the back of the freezer and move older items to the front. This FIFO rotation ensures you’re constantly cycling through your stock. For those with chest freezers, using stackable bins or even color-coded reusable bags can prevent items from getting buried and forgotten at the bottom. You might even keep a simple inventory list taped to the freezer door, which you can update as you add or remove items.