




Why Start Your Push-Up Journey at the Wall?
Before you can master a full push-up on the floor, you need to teach your body the correct movement pattern. The wall push-up is the perfect tool for this. By performing the exercise in a standing position, you significantly reduce the amount of body weight
your muscles have to support. This allows you to focus entirely on form without the strain on your wrists and shoulders that a floor push-up can cause. It's an ideal starting point for beginners or anyone returning to exercise, building a strong foundation in the chest, shoulders, and triceps while also engaging your core. Think of it as learning the mechanics of the push-up in a safe, controlled environment.
The Secret Strength-Builder: Slow Eccentric Movement
The most transformative part of this exercise is the slow, deliberate bending of the elbows as you lower your body toward the wall. This is known as the eccentric phase, where your muscles lengthen under tension. Many people rush this part, but slowing it down is where the magic happens. A slow, controlled descent of three to five seconds forces your muscles to work harder, activating more muscle fibres and building superior strength and control. This emphasis on the lowering phase not only builds muscle more efficiently but also strengthens tendons, which is crucial for preventing injuries as you progress. You are essentially teaching your body to absorb force safely.
Your Step-by-Step Guide to the Perfect Wall Push-Up
Ready to begin? Find a sturdy wall and ensure your footwear won't slip. Stand about an arm's length away from the wall. Place your palms flat on the wall, slightly wider than your shoulders, at about chest or shoulder height. Your body should form a straight line from your head to your heels; engage your core and squeeze your glutes to prevent your hips from sagging. Inhale and slowly begin to bend your elbows, lowering your chest toward the wall over a count of 3-5 seconds. Keep your elbows tucked in at roughly a 45-degree angle, not flared out to the sides. Briefly pause when your nose or chest is close to the wall. Exhale and push back forcefully to the starting position. That's one rep.
Common Mistakes and How to Fix Them
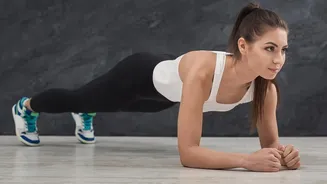
Proper form is more important than the number of reps. Watch out for these common errors: Flared Elbows: Letting your elbows stick straight out to the sides puts unnecessary stress on your shoulder joints. The fix is to think about pointing your elbows back at a 45-degree angle. Sagging Hips: If your lower back arches and your hips drop, your core is not engaged. To correct this, tighten your abdominal muscles and squeeze your glutes to maintain a rigid plank-like position from head to heels. Dropping Your Head: Don't lead with your chin. Keep your neck in a neutral position by looking at a spot on the wall just in front of you. Your chest should move toward the wall first.
Listening to Your Body and Making Progress
When you can comfortably perform several sets of 10-15 repetitions with perfect, slow form, it's time to increase the challenge. The simplest way to progress is to step your feet further back from the wall. This increases the angle of your body and forces your muscles to support more weight. Once that becomes manageable, you can move to an incline push-up, placing your hands on a sturdy countertop, bench, or table. The lower the surface, the more difficult the exercise becomes, creating a seamless bridge toward performing push-ups on the floor. Always prioritise clean form over a harder variation; if your form breaks down, return to the easier version to build more strength.