



The Usual Suspect: Why We Blame the Tawa
When a roti fails to puff or turns out stiff, the tawa is an easy scapegoat. Is it too thin? Not retaining heat? Is it cast iron, non-stick, or steel? We often assume that an unevenly heated pan is scorching the moisture out of our rotis before they can
inflate. A pan that's too cool is also a problem, as it dries the roti out slowly instead of cooking it quickly with a burst of steam. This logic isn't entirely wrong; temperature control is crucial for a good roti. A properly heated, heavy-bottomed tawa that distributes heat evenly creates the ideal environment for the magic to happen. But even the most perfect, professional-grade tawa cannot rescue a dough that was destined to be tough from the start.
The Real Culprit: Understanding Dough Hydration
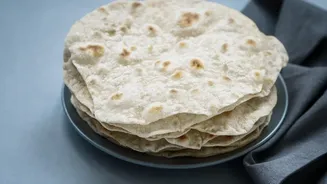
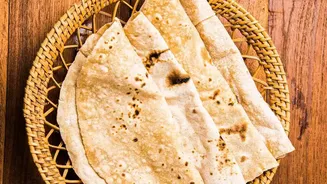
The true foundation of a soft roti is water. The term 'hydration' simply refers to the ratio of water to flour in your dough. A well-hydrated dough is the key to creating the internal steam needed for a roti to puff up. When the moist dough hits the hot tawa, the water inside it instantly converts to steam. This steam pushes the top and bottom layers of the roti apart, creating that iconic, balloon-like puff. This process traps moisture inside, keeping the final product soft and pliable. If the dough is too dry, there simply isn't enough water to create the necessary steam. The result is a dense, flat, and firm roti that becomes even harder as it cools. Food science explains this as 'starch retrogradation,' a process where starch molecules rearrange and harden as they cool, which is accelerated when there's less moisture.
Getting the Feel Right: A Practical Guide
Perfect roti dough isn't about rigid measurements, but about feel. While a good starting point is around one part water to two parts flour, the exact amount can vary based on your atta's brand and grind. The goal is to create a dough that is soft, pliable, and slightly tacky, but not so sticky that it's unmanageable. It's recommended to use warm water, as this helps the flour absorb moisture more effectively and relaxes the gluten, making the dough smoother and more elastic from the get-go. Add the water gradually, mixing it into the flour with your fingertips until a shaggy dough forms. Don't add all the water at once, as this can make the dough too sticky to handle. If it feels too dry, add water by the teaspoon. If it's too sticky, a light dusting of flour can help, but avoid adding too much, as this will dry out the dough and make the rotis tough.
Beyond Water: The Art of Kneading and Resting
Proper hydration is just the first step. Once the water is incorporated, you must knead the dough correctly. Kneading for 6-8 minutes develops the flour's gluten network, which gives the roti its structure and chew while keeping it soft. An under-kneaded dough won't have the strength to trap steam, while an over-kneaded one can become tough. After kneading, the dough must rest. This is a non-negotiable step. Letting the dough rest for at least 20-30 minutes allows the flour to fully absorb the water and lets the gluten strands relax. This makes the dough much easier to roll out without it tearing or shrinking back, and it helps the rotis puff up more effectively during cooking. Skipping this rest period is one of the most common reasons people end up with stiff rotis.
So, Does the Tawa Matter at All?
Yes, but it's the co-star, not the lead actor. Once you have a perfectly hydrated, kneaded, and rested dough, the tawa’s job is to cook it quickly and evenly. It must be preheated properly over medium-high heat. A cold tawa will make the roti stick and dry out. Too high, and it will burn before it can puff. An iron or cast-iron tawa is often preferred for its excellent heat retention, which ensures a consistent temperature. But the main takeaway is this: a great tawa makes the job easier, but it can't fix fundamental flaws in the dough. The softest, puffiest rotis are born long before they hit the heat.