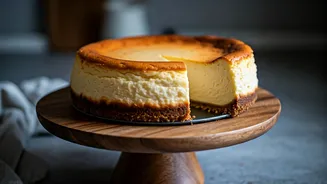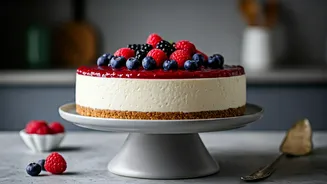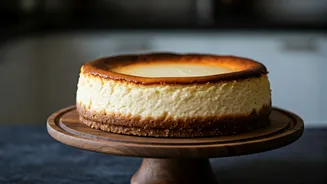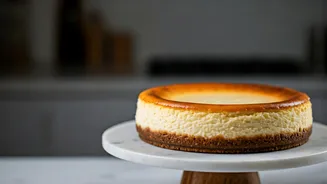


The Foundation: A Flawless Crust
The journey to a bakery-level cheesecake begins not with the filling, but with the crust. A soggy or crumbly base is the first giveaway of a homemade dessert. For a foolproof graham cracker crust, you’ll need about 200g of crushed graham crackers, 100g
of melted unsalted butter, and 50g of granulated sugar. Pulse the crackers in a food processor until they are fine crumbs, then mix in the sugar and melted butter until the mixture resembles wet sand. The secret is in the pressing. Use the flat bottom of a measuring cup to press the mixture firmly and evenly into the bottom and slightly up the sides of a 9-inch springform pan. A tightly packed crust won't fall apart when you slice it. Bake it for 10 minutes at 175°C and let it cool completely before adding the filling. This pre-bake ensures a crisp texture that stands up to the creamy filling.
The Heart of the Matter: The Creamiest Filling
The soul of a great cheesecake is its texture: dense, smooth, and utterly luscious. This is non-negotiable, and it comes down to ingredients and temperature. You will need 900g of full-fat, block-style cream cheese—do not substitute with the whipped or low-fat varieties, as they contain more water and stabilisers that will ruin the texture. The single most important rule is that your cream cheese, eggs (you’ll need 4 large ones), and sour cream (200g) must all be at true room temperature. Cold ingredients don’t emulsify properly, leading to a lumpy batter and a grainy final product. Take everything out of the fridge at least two hours before you begin. This small act of patience is the difference between a good cheesecake and a great one.
The Technique: No Cracks, Guaranteed
Cracks are the nemesis of the home baker, but they are entirely preventable. They are caused by two things: over-mixing the batter (incorporating too much air) and drastic temperature changes. When mixing your filling, use a paddle attachment on low speed. Start by beating the room-temperature cream cheese with sugar (250g) until smooth, scraping down the bowl frequently. Add your eggs one at a time, mixing only until the yellow disappears. Do not whip them; you are not making a meringue. Finally, gently fold in the sour cream, vanilla extract, and a pinch of salt. The goal is a homogenous, lump-free batter with as little air as possible.
The Secret Weapon: The Water Bath
If you want that silky, uniform texture and a pale, crack-free top, you must use a water bath (or bain-marie). This setup creates a steamy, humid environment in the oven, allowing the cheesecake to bake gently and evenly. It prevents the edges from cooking faster than the centre, which is a primary cause of cracking. To prepare, wrap the outside of your springform pan with two or three layers of heavy-duty aluminium foil, ensuring it’s watertight. Place the pan in a larger roasting pan. Pour your filling into the cooled crust. Then, carefully pour hot water into the roasting pan until it comes about halfway up the sides of your springform pan. Now, it's ready for the oven.
The Cool Down: The Final Test of Patience
You’ve done everything right; don’t rush the final step. Bake at 160°C for about 60-70 minutes. The cheesecake is done when the edges are set but the centre (about a 2-inch circle) still has a slight wobble, like set jelly. Do not bake it until it’s firm all the way through. Once done, turn the oven off, prop the door open with a wooden spoon, and let the cheesecake cool in the oven for one hour. This gradual temperature drop is the final insurance against cracking. After an hour, remove it from the water bath, take off the foil, and let it cool on a wire rack until it reaches room temperature. Only then should you cover it loosely with plastic wrap and refrigerate it for at least 8 hours, but preferably overnight. This long chill is essential for the flavour to develop and the texture to set perfectly.