




Understanding the Basics: Greens and Browns
A successful compost pile relies on a healthy balance of two types of materials: 'greens' and 'browns'. Greens are rich in nitrogen and include most of your kitchen waste, such as fruit and vegetable scraps, and, importantly, used coffee grounds. Despite
their colour, coffee grounds are a nitrogen-rich 'green' material that helps the compost pile heat up, speeding decomposition. Browns are carbon-rich materials that provide bulk and allow air to circulate. Think of things like dried leaves, small twigs, shredded newspaper, and cardboard rolls. A good rule of thumb is to aim for a ratio of about two to three parts brown material for every one part green material.
What You Can and Cannot Compost
Most plant-based kitchen waste is perfect for your compost bin. This includes all your fruit and vegetable peels, cores, and ends. Used coffee grounds and even paper filters can go right in. Crushed eggshells are also a fantastic addition, providing valuable calcium. In small amounts, you can add stale bread or plain cooked grains. However, some items should be avoided as they can attract pests and create foul odours. Steer clear of meat, fish, bones, dairy products, and any oily or greasy foods. It is also wise to avoid adding weeds that have gone to seed or diseased plants, as the compost may not get hot enough to kill them off.
Choosing Your Composting Method
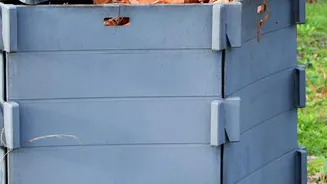
You don't need a lot of space or fancy equipment to get started. For outdoor composting, you can create a simple pile in a corner of your yard or use a compost bin. Bins can be purchased or easily made from materials like wooden pallets. A good size to aim for is about one cubic metre (3x3x3 feet), as this volume helps the pile generate and retain the heat needed for decomposition. Ensure your location is on bare soil, gets a mix of sun and shade, and has good air circulation. For those with limited space, a compost tumbler is an excellent, contained option that makes turning the compost easy. Indoor methods like vermicomposting (using worms) are also highly effective for smaller amounts of kitchen scraps.
Building and Maintaining Your Compost Pile
Start your pile with a layer of bulky brown materials like twigs to help with aeration at the bottom. Then, begin layering your green and brown materials, like making a lasagna. Add a layer of greens (kitchen scraps, coffee grounds) followed by a layer of browns (dried leaves, shredded paper). It's helpful to keep a small container in your kitchen to collect scraps daily. Each time you add fresh kitchen waste, cover it with a layer of browns to prevent odours and deter pests. Your compost should be kept moist, like a wrung-out sponge, but not waterlogged. Water it occasionally if it seems dry. Turning the pile with a garden fork every week or two is crucial. This aerates the mixture, distributing moisture and speeding up the decomposition process significantly.
Knowing When Your Compost Is Ready
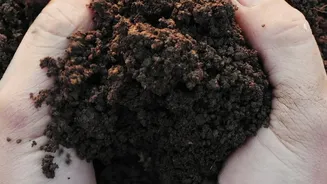
Patience is key, as composting can take anywhere from a few months to a year, depending on the materials and how often you turn it. You'll know your compost is ready when it has transformed into a dark, crumbly material that looks and smells like rich, earthy soil. You should no longer be able to identify the original kitchen scraps you put in. The pile will have shrunk in size and will no longer be warm in the centre, indicating that the most active decomposition is complete. A few woody bits might remain; you can simply sift these out and return them to your active pile.