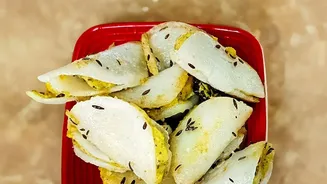







The aroma of freshly fried gujiya is the scent of celebration. This beloved festive sweet, with its crisp outer layer and rich, sweet filling, can feel intimidating to make at home, but the process is simpler than you think.
The Foundation: A Simple, Flaky Dough
The secret to a perfectly crisp
gujiya lies in its dough. It’s a simple mixture, but the technique is key. You'll need all-purpose flour (maida), a generous amount of ghee, and a little water or milk to bind it all together. The most crucial step here is incorporating the ghee into the flour, a process known as 'moyan'. Rub the ghee into the dry flour with your fingertips until the mixture resembles coarse breadcrumbs. This step is what creates the flaky, blistered texture on the shell when fried. Once the fat is incorporated, add water little by little to form a stiff, but pliable dough. Knead it for just a few minutes until it’s smooth, then cover it with a damp cloth and let it rest for at least 30 minutes. This resting period is non-negotiable; it allows the gluten to relax, making the dough easier to roll out without it shrinking back.
The Heart: A Rich and Sweet Filling
While the dough rests, you can prepare the soul of the gujiya: the filling. The classic recipe calls for khoya (also known as mawa or milk solids), which provides a rich, creamy base. To begin, lightly roast the khoya in a pan over low heat until it loosens up and becomes aromatic, then set it aside to cool. For texture and flavour, lightly roast some semolina (suji) until golden. The real magic comes from the additions. Finely chopped nuts like almonds, cashews, and pistachios add a delightful crunch. Dried coconut, either desiccated or freshly grated, brings a subtle sweetness. The final touch is a blend of aromatic spices. Ground cardamom is essential, and a pinch of nutmeg can add a wonderful warmth. Once all your components are prepared and completely cooled—this is important to prevent the dough from tearing—gently mix them together with powdered sugar. Taste and adjust the sweetness to your liking.
The Art of Shaping and Sealing
With your dough rested and your filling ready, it’s time to assemble the gujiyas. Pinch off small, equal-sized balls from the dough and roll each one into a thin, round disc, about 4-5 inches in diameter. Try to keep the edges slightly thinner than the centre. Place a spoonful of the cooled filling onto one half of the disc, leaving a clear border around the edge. Be careful not to overfill, as this can cause the gujiya to burst open while frying. To seal it, lightly brush the edges with water and fold the other half of the dough over to create a semi-circle. Press the edges firmly to seal them completely. For a traditional, decorative edge, you can create a pattern by pinching and twisting the sealed border, a technique called 'gothna'. Alternatively, for a foolproof seal and a uniform shape, you can use a gujiya mould. Simply place the rolled disc over the open mould, add the filling, and press it shut.
Frying to Golden Perfection
The final step transforms your creation into the crispy, golden delight you've been waiting for. The key to a perfect fry is temperature control. Heat ghee or oil in a kadai over a low-medium flame. The oil should not be smoking hot. To test if it's ready, drop a tiny piece of dough into the oil; it should sizzle gently and rise to the surface slowly. If it rises too quickly, the oil is too hot, which will result in gujiyas that are browned on the outside but raw and soft inside. Carefully slide a few gujiyas into the oil, ensuring not to overcrowd the pan. Fry them on a consistently low flame, turning them occasionally, for about 10-12 minutes or until they are a beautiful pale gold colour and evenly cooked. This slow-frying process is what draws the moisture out of the dough, making the shell incredibly crisp. Once done, remove them with a slotted spoon and let them drain on a wire rack or paper towels.