





Why Atta is Your Secret Weapon
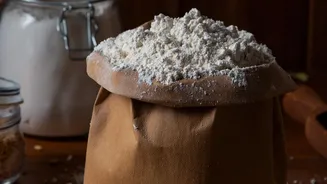
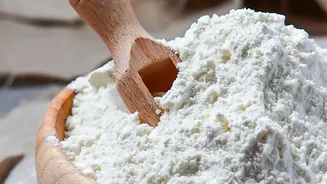
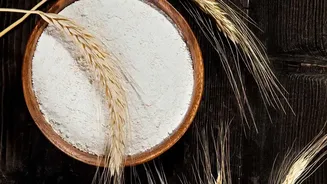
Forget the myth that you need expensive imported bread flour to begin your sourdough journey. Basic Indian whole wheat flour, or atta, is an excellent base for a starter. Because atta is a whole-grain flour, it contains the bran and the germ of the wheat kernel.
These parts are rich in the natural yeasts and microbes needed to kickstart the fermentation process. The finely milled texture of most chakki-ground atta also helps it absorb water well. This abundance of nutrients provides a feast for the wild yeast you're trying to cultivate, often leading to a more active and robust starter right from the beginning.
What You Will Need
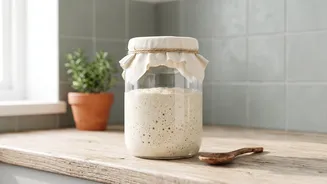
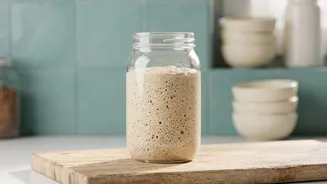
The beauty of sourdough is its simplicity. You don’t need any fancy equipment to get started. All you require is a handful of basic kitchen items: A Clean Glass Jar: A one-litre glass jar is ideal. It needs to be large enough to allow the starter to grow. A transparent container helps you monitor the bubbling activity. Indian Whole Wheat Flour (Atta): Any standard brand of atta will work perfectly. Water: Use filtered or RO water. Chlorinated tap water can sometimes inhibit the growth of the wild yeast, so it's best to avoid it if possible. A Kitchen Scale: While you can use volume measurements, a small digital scale ensures accuracy, which is crucial for consistent feeding and results. A Spoon or Spatula: For mixing. A Loose Lid or Cloth: To cover the jar, allowing air to circulate while keeping dust and pests out.
The Daily Process: A Step-By-Step Guide
Creating a starter is a daily ritual that takes about a week. Be patient; every starter develops at its own pace, especially depending on the temperature of your kitchen. A warmer environment, common in many Indian homes, can actually speed up fermentation. Day 1: In your clean jar, mix 100 grams of atta with 100 grams of lukewarm water. Stir until no dry flour remains, creating a thick paste. Cover the jar loosely and leave it in a warm spot, away from direct sunlight, for 24 hours. Day 2: You might see a few small bubbles, or you might see nothing at all. This is normal. Today is a day of rest. Leave the jar undisturbed for another 24 hours. Day 3: It's time for the first feeding. You should see some activity now—bubbles and a slightly tangy aroma. Discard about half of the mixture. To the remaining starter, add 50 grams of atta and 50 grams of water. Mix well, cover, and let it rest for another 24 hours. Day 4 to 7: Now, you will move to a more frequent feeding schedule. Every 12 hours (morning and evening), you will repeat the Day 3 process: discard about half of your starter and feed the remainder with 50 grams of atta and 50 grams of water. This regular feeding strengthens the yeast culture. By day seven, your starter should be very active, doubling in volume within a few hours of feeding.
Signs of a Healthy, Active Starter
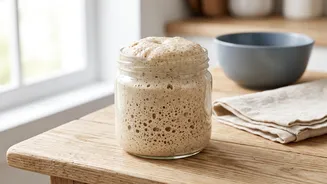
How do you know your starter is ready for baking? Look for these key signs. First, it should be full of bubbles, both on the surface and throughout the mixture. Second, it will have a predictable rhythm of rising and falling after each feeding. A mature starter will typically double in size within 6 to 8 hours of being fed. Finally, the aroma will evolve from a simple flour-and-water smell to something pleasantly tangy and slightly sour, like yoghurt. This indicates that the community of lactic acid bacteria and wild yeast is well-established and balanced. Once you observe this consistent activity for a couple of days, your starter is ready to leaven your first loaf of bread.
Troubleshooting Common Issues
Sometimes, your starter might behave in unexpected ways. Don't panic; most issues are easily fixed. A Dark Liquid on Top: This liquid is called "hooch" and is a sign that your starter is hungry. It’s simply alcohol, a byproduct of fermentation. Just stir it back in or pour it off before your next feeding. Sluggish Activity: If your starter isn't bubbling much, it might be too cold. Try moving it to a warmer spot, like inside your oven with the light on. Ensure you're using whole wheat atta, as its extra nutrients help boost activity. * Unusual Smells: In the first few days, the starter might develop some strange smells as different bacteria compete for dominance. As long as you don't see any pink, orange, or fuzzy mould, just continue your feeding schedule. The desirable yeast and bacteria will eventually take over, and the smell will become pleasantly sour.