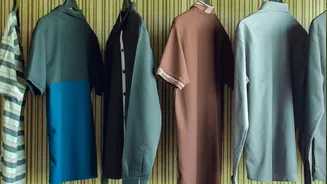







Step 1: The Total Empty-Out
To truly reset your wardrobe, you must start with a clean slate. This means taking every single item out. Yes, everything. Pile it all on your bed or a clear floor space. This step is often skipped because it feels overwhelming, but it's crucial for two
reasons. First, it forces you to confront the sheer volume of what you own, which is often a motivating eye-opener. Second, it allows you to see each item away from its usual neighbours, giving you a fresh perspective. This is the only way to accurately take inventory and clean the physical space—dusting shelves and vacuuming the floor—before thoughtfully putting things back.
Step 2: The Decisive Edit
Now, it's time to sort your pile. Create distinct groups: Keep, Donate/Sell, and Store. As you pick up each item, be honest with yourself. Ask critical questions: Does this fit me right now? Do I feel good when I wear it? Does it suit my current lifestyle, not a fantasy one? If you're unsure, try it on. A good rule is to let go of anything you haven't worn in the past year. Be ruthless with duplicates; you probably only need one favourite pair of black jeans, not five. The goal is to curate a collection of pieces you genuinely love and use, which makes daily dressing infinitely easier.
Step 3: Categorise Like a Pro
Once you have your 'Keep' pile, the real organisation begins. The most effective method is to group like with like. Start by creating broad categories: tops, trousers, jeans, dresses, skirts, jackets, and so on. This ensures you know exactly where to find a specific item. You can stop there, or you can take it a step further for maximum clarity by sub-categorising within each group. For instance, arrange your tops by sleeve length—from sleeveless to long-sleeved. This simple logic makes locating pieces faster and helps you see your inventory at a glance.
Step 4: The Power of Colour Coding
After categorising by type, arrange the items within each group by colour. This is the secret ingredient that transforms your wardrobe from a storage space into a shoppable boutique. Arranging everything in a gradient, from light to dark, is visually calming and incredibly functional. When you're looking for a white shirt, you can go directly to the 'shirt' section and then to the 'white' sub-section. This system not only makes finding things effortless but also helps you immediately see where you have gaps or excesses in your wardrobe. Plus, it creates a beautiful, aesthetically pleasing closet.
Step 5: Maximise Visibility
The core principle of a functional wardrobe is 'if you can't see it, you won't wear it'. Use strategic storage to make everything visible. Opt for slim, matching hangers to create a streamlined look where no item is hidden. File-fold items like t-shirts and sweaters in drawers instead of stacking them; this allows you to see every piece at once, just like files in a cabinet. For accessories, use clear boxes or drawer dividers to keep things like belts and scarves contained but visible. Consider pull-out shelves or open cubbies for shoes and bags to ensure nothing gets lost in the back.
Step 6: Maintain Your New System
An organised wardrobe is not a one-time project; it requires small, consistent efforts to maintain. Adopt a 'one in, one out' rule to prevent clutter from accumulating again. Spend five minutes at the end of each week putting away any items that have strayed from their designated homes. It's also helpful to keep a small donation basket in or near your closet for items you realise you no longer want. A seasonal swap, moving off-season clothes to less accessible storage like high shelves or under-bed boxes, will also keep your main wardrobe relevant and easy to navigate all year round.