


The 'Zero Guilt' Promise
Let’s be clear about what “zero guilt” means here. It’s not about food morality; it’s about making a smarter choice that feels just as indulgent. Commercial potato chips are typically deep-fried in oil and loaded with sodium and preservatives. Our formula
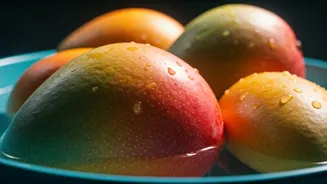
relies on the natural goodness of sweet potatoes, which are packed with Vitamin A, fibre, and antioxidants. We use a minimal amount of oil and bake them, not fry them, drastically cutting down on fat content without sacrificing the crunch we all crave. This is about creating a snack that nourishes your body while satisfying your late-night munchies.
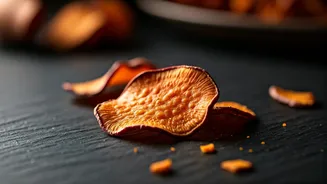
The Science of the Perfect Crisp
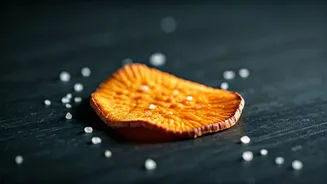
The arch-nemesis of a homemade crisp is moisture. Sweet potatoes are full of water, and if you just slice and bake them, you’ll end up with floppy, steamed discs. The secret to an shatteringly crisp texture lies in removing as much moisture as possible before and during baking. This involves three key steps: slicing incredibly thin, giving the slices a cold water bath, and drying them meticulously. The cold water pulls excess starch from the surface of the potato, which prevents them from sticking together and helps them crisp up beautifully in the oven’s dry heat.
Your Ultimate Crisp Toolkit
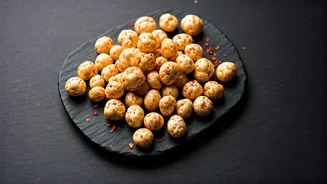
You don’t need fancy equipment, but one tool is non-negotiable for achieving uniform crispiness: a mandoline slicer. It’s the only way to get consistently paper-thin slices (about 1.5mm or 1/16th of an inch). If you use a knife, do your absolute best to keep them uniformly thin, but be aware that thicker slices may result in a chewier texture. Here's your shopping list: - 2 medium sweet potatoes, washed and scrubbed - 1 tablespoon of a high-smoke-point oil (like avocado, grapeseed, or even a light olive oil) - ½ teaspoon of salt (or to taste) - Your choice of spices: smoked paprika, garlic powder, and a pinch of cayenne are a classic combination.
The Step-by-Step Formula
1. **Preheat and Prep:** Preheat your oven to 120°C (250°F). Line two large baking sheets with parchment paper. Do not grease the sheets; the paper is essential to prevent sticking. 2. **Slice Thinly:** Using your mandoline, carefully slice the sweet potatoes into very thin rounds. Place the slices into a large bowl of cold water as you go. 3. **Soak and Dry:** Let the slices soak for at least 30 minutes. This is a crucial step. Afterwards, drain the water and dry the slices completely. Spread them on a clean kitchen towel and pat them dry with another towel. Be thorough—any remaining moisture is the enemy. 4. **Oil and Season:** In a dry bowl, toss the potato slices with the tablespoon of oil until they are lightly and evenly coated. Don’t drown them. Sprinkle with salt and your chosen spices and toss again to distribute. 5. **Arrange and Bake:** Arrange the slices in a single layer on the prepared baking sheets. Do not let them overlap, or they will steam instead of crisping. You will likely need two trays and may need to bake in batches. 6. **The Low and Slow Bake:** Bake for 1 hour, then flip the slices over. Continue to bake for another 45-60 minutes, or until they are dry to the touch and curled at the edges. Keep a close eye on them in the last 20 minutes, as they can go from perfect to burnt very quickly.
Troubleshooting and Flavour Variations
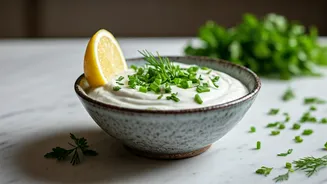
Are your crisps still a bit soft? The most likely culprits are slices that were too thick, not dried enough, or an overcrowded pan. If they come out of the oven with a little softness in the centre, don't worry. They will continue to crisp up as they cool on the tray. For flavour, the sky’s the limit. Try a sprinkle of chaat masala and black salt for a classic Indian twist. A mix of cinnamon and a tiny bit of sugar can satisfy a sweet craving. Or, keep it simple with rosemary and sea salt. For a creamy counterpoint, serve them with a simple yogurt dip seasoned with garlic and fresh herbs.