




Why Excess Flour Causes Toughness
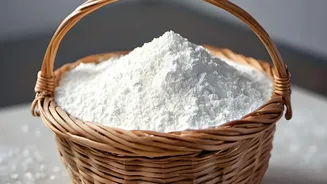
The main reason rotis become hard is moisture loss. When you sprinkle too much dry flour (known as palin or parathan) onto your rolling surface, that flour doesn't just prevent sticking; it gets worked into the dough. Each new layer of dry flour absorbs
precious moisture from your carefully prepared atta. This alters the flour-to-water ratio, making the dough progressively drier and denser. As the roti cooks on the hot tawa, this integrated dry flour cooks differently, preventing the even distribution of steam needed for the roti to puff up. The result is a flatbread that is heavy, chewy, and hardens quickly as it cools, rather than staying soft and pliable.
The Real Problem: A Sticky Dough
The impulse to use a lot of dry flour usually stems from a single issue: a dough that’s too sticky to handle. However, a slightly sticky dough is often a sign that you have the right hydration level for soft rotis. The secret isn't to combat stickiness with more flour, but to prepare the dough correctly from the start. Use lukewarm water, as it helps the atta absorb moisture more efficiently and relaxes the gluten. Add water gradually until you have a dough that is soft and pliable, but not overly wet. If it feels like soft clay or is just slightly tacky to the touch, you are on the right track. A well-hydrated dough is the foundation for a roti that is easy to roll and stays soft.
Knead Well and Let It Rest
Proper kneading and resting are non-negotiable for soft rotis. Kneading for 8-10 minutes develops the gluten network, which gives the roti its structure and elasticity. After kneading, you must let the dough rest. Resting for at least 15-30 minutes allows the gluten to relax and the moisture to distribute evenly throughout the dough. If you try to roll it immediately, the gluten will be too tight, causing the dough to resist and shrink back, which leads to a tougher roti. Cover the dough with a damp cloth or a lid during this resting period to prevent the surface from drying out.
Smarter Rolling Techniques
To minimise dry flour, use only a tiny amount to lightly dust your rolling surface. Dip the dough ball into the flour once, and then tap off any excess. This should be enough to get you started. As you roll, use gentle, even pressure from the centre outwards. Avoid pressing too hard, which can make the dough stick and tempt you to add more flour. If sticking persists, instead of re-dusting the whole surface, lift the roti and apply a tiny pinch of flour just where it’s needed. Brushing off any visible excess flour before placing the roti on the tawa can also make a significant difference.
The Oil and Ghee Alternative
A fantastic alternative to dry flour is using a small amount of oil or ghee. Before you begin rolling, apply a few drops of oil to the rolling board (chakla) and the rolling pin (belan). This creates a non-stick surface that allows the dough to be rolled out smoothly without absorbing any extra dryness. You can also rub a little oil onto your palms when handling the dough balls. This method not only solves the sticking problem but also helps in creating a softer, more flavourful roti that stays tender for longer. Adding a teaspoon of oil or ghee directly into the dough during the final stages of kneading is another popular technique to enhance softness.