


The Foundation: A Perfect Chocolate Cake
Before any decoration begins, the heart of your creation is the cake itself. A vintage-inspired cake deserves more than just a standard mix. You're aiming for a dark chocolate cake that is both rich in flavour and structurally sound enough to support
the ganache. A recipe that uses oil and sour cream often yields a wonderfully moist and tender crumb that stays fresh for days. When baking, ensure your layers are as even as possible. Using cake strips or simply levelling the cooled tops with a serrated knife creates a flat, stable canvas, which is crucial for a professional finish. Allow your cakes to cool completely before you even think about frosting; a warm cake and ganache are a recipe for a melted mess.
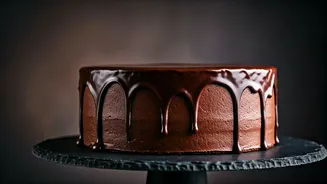
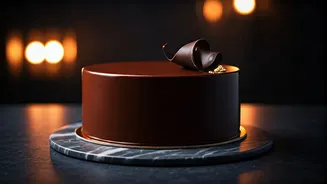
The Soul: Mastering Dark Chocolate Ganache
Ganache is a simple emulsion of just two ingredients: chocolate and heavy cream. Its beauty lies in its versatility. For this cake, you'll need a ganache that’s smooth, glossy, and the right consistency for both covering the cake and creating decorative elements. A 1:1 ratio by weight of dark chocolate (around 60% cacao) to heavy cream is a reliable starting point for a frosting and filling ganache. To make it, heat the cream until it just simmers, then pour it over finely chopped chocolate in a heat-proof bowl. Let it sit for a few minutes to gently melt the chocolate before stirring slowly from the center outwards until a smooth, silky emulsion forms. If your ganache splits or becomes grainy, it's often due to the cream being too hot or the mixture being over-agitated. A gentle whisk and sometimes a touch more warm cream can often bring it back to life.
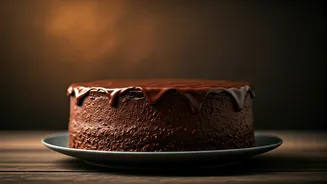
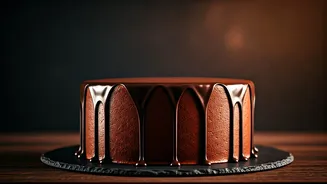
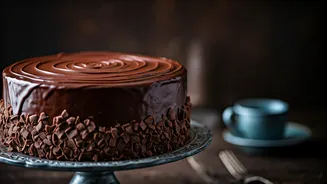
Assembly: Building a Flawless Canvas
Patience during assembly is what separates a good cake from a great one. Start by applying a 'crumb coat'—a very thin layer of ganache over the entire cake to trap any loose crumbs. Chilling the cake for about 30 minutes after this step is a non-negotiable for a pristine final layer. Once chilled, apply a thicker, even layer of your cooled, spreadable ganache. Use an offset spatula and a bench scraper or cake smoother to get the sides perfectly straight and the top level. A rotating cake turntable is your best friend here, allowing you to achieve a smooth finish with continuous motion. Don't worry about perfection on the first pass; you can smooth and patch areas as you go. Chill the cake again until the ganache is firm to the touch before moving on to the final decorations.
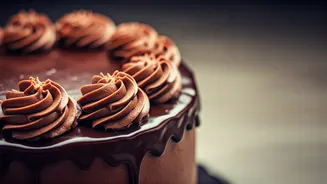
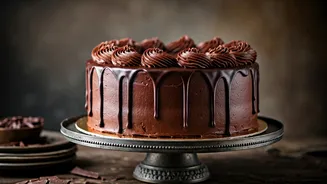
The Vintage Aesthetic: Piping with Purpose
The 'vintage' look is all about the intricate, layered piping, a style often associated with the Lambeth method. But you don’t need to be a master to achieve a vintage feel. The key is layering different, relatively simple piping styles. Start with a larger border, like a shell pattern using a large star tip, around the top and bottom edges of the cake. Then, use smaller tips to add more delicate details, such as smaller shells, dots, or swags on top of or alongside the initial border. Practicing your piping on parchment paper first can help build confidence and consistency. Hold your piping bag at a 45-degree angle for most border work, applying steady pressure. For a classic vintage look, stick to one colour palette, letting the texture of the piping be the star of the show.
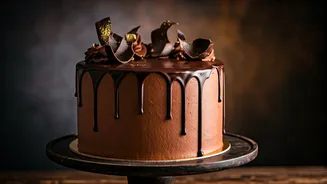
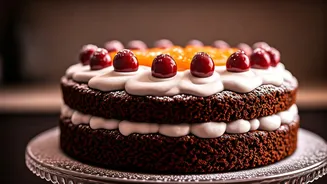
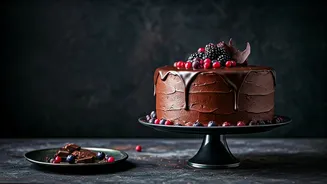
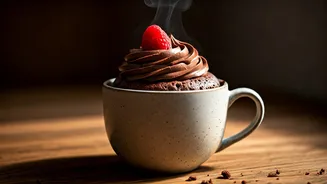
Finishing Touches: Simple Elegance
With a beautifully piped dark chocolate cake, less is often more when it comes to final touches. The deep, rich colour of the ganache provides a dramatic backdrop. You don't need a riot of colour. Consider a simple cascade of chocolate curls or shavings over the top, or a strategic dusting of high-quality cocoa powder. Fresh berries can add a pop of natural colour and a complementary flavour. For a truly elegant, old-world feel, a few carefully placed, food-safe fresh flowers or some edible gold leaf can elevate the entire design without overwhelming it. The goal is to complement the intricate piping, not compete with it. These final details are what make the cake uniquely yours.