


What Makes a Wall Sit So Powerful?
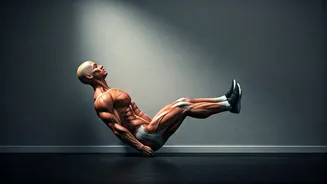
The secret to the wall sit’s effectiveness lies in a single word: isometric. Unlike dynamic exercises that involve movement (like a squat or a lunge), an isometric exercise involves contracting your muscles without changing their length. You hold a static
position, and your muscles work hard to maintain it. For the wall sit, you are essentially holding a squat position with the support of a wall. This continuous tension places a significant load on your quadriceps (the large muscles at the front of your thighs), forcing them to fire consistently. This process builds muscular endurance and strength without putting any strain on your joints, making it a fantastic low-impact option.
How to Perform the Perfect Wall Sit
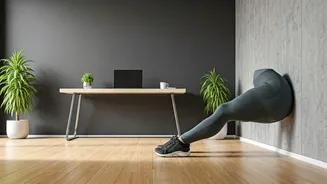
Form is everything when it comes to getting results and preventing injury. While the concept is simple, executing it correctly makes all the difference. Follow these steps for a perfect wall sit: 1. **Find a sturdy wall:** Stand with your back flat against a smooth, solid wall. 2. **Position your feet:** Your feet should be shoulder-width apart and about two feet away from the wall. 3. **Slide down:** Slowly slide your back down the wall until your thighs are parallel to the floor. Your knees should be directly above your ankles, forming a 90-degree angle. Your hips should also be at a 90-degree angle. 4. **Check your posture:** Ensure your entire back, from your shoulders to your lower back, is pressed firmly against the wall. Engage your core by pulling your belly button towards your spine. This prevents your lower back from arching. 5. **Hold the position:** Keep your arms relaxed by your sides or resting on your thighs (but don't use them to push up!). Breathe steadily and hold the position for your desired time.
The Muscles You're Actually Working
While the headline screams “quads,” the wall sit is more of a team player than you might think. Yes, the primary target and the muscle group you’ll feel “burning” the most is the quadriceps. This is because they are working nonstop to hold your knee in extension against gravity. However, other muscles are also recruited to maintain stability and form. Your glutes (buttocks) and hamstrings (back of the thighs) are engaged to help stabilize your hips. Furthermore, keeping your back pressed against the wall requires significant core engagement, turning this simple leg exercise into a sneaky core workout as well.
Common Mistakes to Avoid
A few small errors can reduce the effectiveness of the wall sit or even lead to discomfort. Watch out for these common mistakes: * **Sliding too low:** Don't let your hips drop below your knees. This puts unnecessary pressure on your knee joints. The goal is a 90-degree angle, not deeper. * **Knees caving inwards:** Actively press your knees outwards so they track in line with your feet. Letting them collapse inwards can strain the knee ligaments. * **Not keeping your back flat:** Arching your lower back takes the emphasis off your legs and can strain your spine. Focus on keeping your entire back in contact with the wall. * **Holding your breath:** It's a natural tendency when under strain, but you must continue to breathe deeply and evenly. This delivers oxygen to your working muscles and helps you hold the position longer.
How to Incorporate Wall Sits Into Your Routine
The beauty of the wall sit is its accessibility. You can do it almost anywhere you have a spare wall. If you’re a beginner, start by holding the position for 20-30 seconds. Aim for 3 sets, with a 30-second rest in between. As you get stronger, gradually increase your holding time. A great goal is to work up to holding the position for 60 seconds or more. You can add them to the end of a leg workout as a “finisher” to completely fatigue the quads, or do them on their own on days you can’t make it to the gym. You can even do a quick set while waiting for your food to cook or during a commercial break.