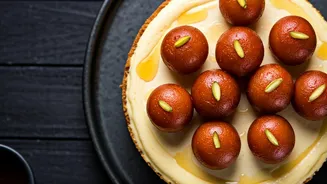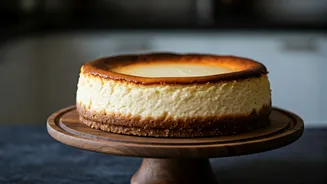


Start with a Solid Foundation
The perfect cheesecake begins with its base. While a store-bought crust is convenient, a homemade one provides superior flavour and texture. The classic is a graham cracker or digestive biscuit crust. The trick is to crush your biscuits into fine, sand-like
crumbs and mix them with just enough melted butter to make the mixture resemble wet sand. Don't be shy with the butter; it’s what binds the crust and prevents it from becoming a crumbly mess. Press the mixture firmly and evenly into the bottom and slightly up the sides of your springform pan. A flat-bottomed glass or measuring cup is the perfect tool for this job. For a sturdier base that won’t get soggy, pre-bake the crust for about 10 minutes before pouring in the filling. This creates a crisp, golden foundation worthy of the filling it will soon hold.
Room Temperature Is Not a Suggestion
If you only follow one piece of advice, let it be this: all your dairy and egg ingredients must be at room temperature. This is non-negotiable for a silky-smooth, lump-free filling. Cold cream cheese is stiff and notoriously difficult to beat smoothly, resulting in lumps that will haunt your final product. Take your cream cheese, eggs, and sour cream or heavy cream out of the fridge at least two hours before you begin. When the cream cheese is soft, it will combine effortlessly with the sugar, creating a velvety base. Add your eggs one at a time, mixing on low speed just until the yolk disappears. This brings us to another critical point: do not over-mix the batter, especially after the eggs are in. Over-mixing incorporates too much air, which causes the cheesecake to puff up dramatically in the oven and then sink and crack as it cools.
The Secret Weapon: A Water Bath
The dreaded crack down the centre of a cheesecake is the baker’s nightmare. The single most effective tool against this is a water bath, or bain-marie. This technique involves placing your springform pan inside a larger roasting pan and filling the outer pan with hot water. This does two crucial things: it creates a humid, steamy environment in the oven, which keeps the top of the cheesecake moist and prevents it from drying and cracking. Secondly, the water insulates the pan, promoting gentle, even cooking from the outside in. This prevents the edges from over-baking before the centre is set. To prepare for a water bath, you must wrap the outside of your springform pan in multiple layers of heavy-duty aluminium foil to prevent any water from seeping into the crust. It may feel like an extra step, but it’s the closest thing to a guarantee for a flawless finish.
Patience Is an Ingredient: The Cooling Process
You’ve done everything right, and a beautiful cheesecake is baking in the oven. The temptation is to pull it out and dig in. Resist! The cooling process is just as important as the baking. Abrupt temperature changes are a primary cause of cracking and sinking. When the baking time is up—the edges should be set, but the centre should still have a slight wobble—turn the oven off completely. Prop the oven door open with a wooden spoon and let the cheesecake cool down inside the oven for at least one hour. This gradual cooldown allows the cheesecake to set gently without the shock of cold air. After an hour in the oven, move it to a wire rack on the counter and let it cool to room temperature. Only then should you cover it loosely with plastic wrap and transfer it to the refrigerator to chill for at least six hours, or preferably overnight. This long chill is essential for the cheesecake to firm up and for the flavours to meld.