






The Treasure in Your Trash
It may feel like second nature to peel vegetables and discard the skins, ends, and stems. However, these discarded parts are often nutritional powerhouses. Studies show that the skins and outer layers of many vegetables contain a higher concentration
of vitamins, minerals, and antioxidants than the flesh itself. For example, potato skin is packed with more potassium, iron, and B vitamins than the potato flesh. Similarly, a significant portion of a carrot's antioxidants are found in or just below the peel. Simmering these scraps in water is an effective way to extract these water-soluble vitamins and beneficial plant compounds, transforming plain water into a nourishing liquid. This process not only reduces food waste but also captures nutrients that would otherwise be lost.
What to Save for Your Broth
Creating a delicious and balanced broth starts with collecting the right ingredients. The foundation of a great scrap broth typically relies on aromatic vegetables. A good rule of thumb is to save clean scraps from any vegetable you'd normally put in a soup. Keep a large, labelled bag or container in your freezer and add to it over time. Excellent candidates include: Onion and garlic skins (which add a beautiful golden colour), carrot peels and ends, celery leaves and bottoms, and mushroom stems. You can also add parsley and other herb stems, leek tops, and the peels from sweet potatoes. These items build a savoury, well-rounded flavour base. Don't worry about precise quantities; a mix of what you have on hand will work wonderfully.
Scraps to Skip for a Better Broth
While many scraps are great for broth, some can negatively affect the final taste and texture. It is best to avoid vegetables from the cruciferous family, such as broccoli, cauliflower, cabbage, and Brussels sprouts. When simmered for a long time, they can release bitter compounds that will make your broth unpalatable. Potato peels are generally fine in moderation, but using too many can make the broth starchy or cloudy. It's also wise to avoid anything mouldy, spoiled, or excessively dirty. Some suggest skipping bell peppers and strong herbs like cilantro, as their flavours can become overpowering. Finally, unless you want a vibrant red broth, it's best to leave out beet scraps.
From Scrap Bag to Liquid Gold
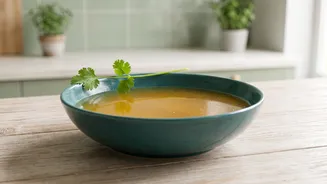
Making your broth is incredibly simple. Once your freezer bag is full (aim for about 8 to 10 cups of scraps), empty the contents into a large stockpot. There is no need to thaw them first. Cover the frozen vegetables with water, ensuring the water level is about an inch above the scraps. For extra flavour, you can add whole peppercorns and a bay leaf. Bring the pot to a boil, then reduce the heat to a gentle simmer. Let it cook for at least 45 to 60 minutes, though simmering for a few hours will create an even deeper, richer stock. There’s no need to add salt at this stage; it’s better to season the final dish you use the broth in. Once the simmering is complete, carefully strain the liquid through a fine-mesh sieve, pressing gently on the solids to extract every last drop of flavour.
Using and Storing Your Homemade Broth
Congratulations, you've just created a versatile kitchen staple from ingredients you would have thrown away. This homemade broth can be used in any recipe that calls for vegetable stock or even water, adding a subtle depth of flavour and a nutritional boost. Use it as a base for soups and stews, to cook grains like rice or quinoa, or as the liquid for a flavourful sauce or gravy. Once cooled, the broth can be stored in an airtight container in the refrigerator for up to five days. For longer storage, pour it into freezer-safe containers or ice cube trays and freeze for up to six months. This way, you'll always have a supply of delicious, homemade broth on hand.