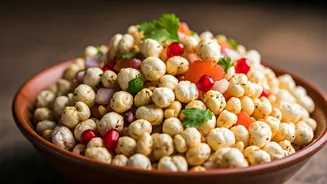


Why Sprouted Ragi?
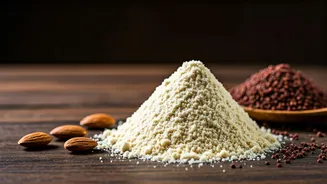
Before we dive into the recipe, let’s talk about our star ingredient. Ragi, or finger millet, is a nutritional powerhouse native to India. It’s naturally gluten-free, rich in calcium, iron, and fibre. The process of sprouting unlocks even more benefits.
When you sprout the grain, you activate enzymes that break down anti-nutrients like phytic acid. This makes the nutrients—especially minerals like iron and zinc—more bioavailable, meaning your body can absorb them more easily. Sprouting also enhances the natural sweetness and reduces the cooking time, making it perfect for a quick recipe like this. You can buy sprouted ragi flour from most health food stores or online, or you can make it at home by soaking, sprouting, drying, and grinding whole ragi grains.
Gather Your Ingredients
This recipe is incredibly flexible, but here is a fantastic base to start with. All you need are a few wholesome ingredients, a mixing bowl, and a pan. No oven required! * 1 cup Sprouted Ragi Flour * 1/2 cup Rolled Oats (quick-cooking or old-fashioned) * 1/2 cup Mixed Nuts (almonds, walnuts, chopped) * 1/4 cup Seeds (pumpkin, sunflower, or sesame) * 1/2 cup Pitted Dates, finely chopped or pureed * 1/4 cup Jaggery or Honey (adjust to taste) * 3-4 tablespoons Ghee or Coconut Oil * 1/2 teaspoon Cardamom Powder (Elaichi) * A pinch of Salt
The Simple Step-by-Step Method
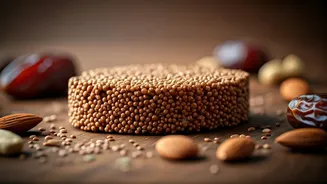
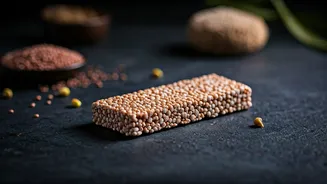
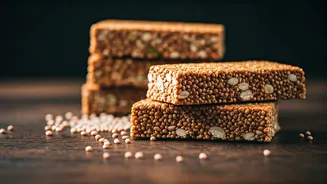
The word ‘master’ might sound intimidating, but this process is wonderfully straightforward. Follow these steps for perfect bars every time. 1. **Roast the Dry Ingredients:** In a heavy-bottomed pan on low heat, lightly dry roast the sprouted ragi flour for 5-7 minutes until it becomes fragrant. Be careful not to burn it. Remove and set aside. In the same pan, lightly toast the rolled oats, chopped nuts, and seeds until they are golden and aromatic. Mix them with the roasted ragi flour. 2. **Create the Binder:** In the same pan, add the ghee or coconut oil. Once it's warm, add the chopped dates and jaggery or honey. Stir continuously on low heat until the jaggery melts and the dates soften into a thick, sticky paste. This will act as the 'glue' for your bars. 3. **Combine Everything:** Turn off the heat. Add the cardamom powder and pinch of salt to the date-jaggery mixture. Now, quickly add the dry ragi-oats-nut mixture to the pan. Use a sturdy spatula to combine everything thoroughly. You need to work fast while the mixture is warm and sticky. Ensure every dry bit is coated with the wet mixture. 4. **Press and Set:** Grease a shallow tray or a thali with a little ghee. Transfer the warm mixture onto the tray. Use the back of a greased flat bowl (katori) or your hands to press the mixture down firmly and evenly into a compact layer about half an inch thick. This step is crucial for ensuring your bars hold their shape.
Pro Tips for Customisation
This recipe is your canvas. Feel free to experiment! For a protein boost, add a tablespoon of unsweetened peanut butter or almond butter to the wet mixture. For extra flavour and texture, consider adding desiccated coconut, dried cranberries, or chopped figs. If your mixture feels too dry, add another tablespoon of honey or a splash of warm milk. If it feels too wet, add a little more oats or ragi flour. The key is to achieve a consistency that holds together when pressed. For a richer flavour, you can also add a teaspoon of unsweetened cocoa powder along with the dry ingredients.
Cutting and Storing Your Bars
Let the mixture cool completely in the tray for at least an hour at room temperature, or for 20-30 minutes in the refrigerator to speed things up. Once firm, use a sharp knife to cut it into squares or rectangular bars of your desired size. These energy bars store beautifully. Place them in an airtight container, with parchment paper between the layers to prevent sticking. They will stay fresh at room temperature for up to a week. For a longer shelf life, you can refrigerate them for up to two weeks. They are a perfect, healthy tiffin snack for kids or a pre-workout bite for you.