





The seated row is a powerhouse exercise for building a strong, defined back and improving posture. But in the rush to lift heavy, many people sacrifice form, leading to stalled progress and potential injury. Mastering the technique is the first and most
critical step.
Why This Exercise Is a Back Day Staple
The seated row is a compound movement, meaning it works multiple muscle groups at once. Its primary targets are the major muscles of the back, including the latissimus dorsi (the 'lats' that create width), the rhomboids (between your shoulder blades), and the trapezius (your upper back and neck muscles). Your biceps and forearms also act as secondary movers. This makes it incredibly efficient for developing a strong and balanced upper body. A well-executed seated row not only builds muscle but is also one of the best exercises for correcting the slouched posture many people develop from sitting at desks. By strengthening the muscles that pull your shoulder blades back, it helps you sit and stand taller, which can protect against upper back stiffness and shoulder issues.
The Most Common Form Mistakes to Avoid
Ego often gets in the way at the gym, and the seated row is a prime example. Loading the weight stack too heavily almost always leads to poor form. One of the most frequent errors is using momentum by rocking your torso back and forth. This recruits your lower back and body weight to move the load, taking tension off the muscles you're trying to train and increasing your risk of a lower back injury. Another common mistake is rounding your back, which puts your spinal discs under tremendous pressure. Other frequent faults include shrugging your shoulders up towards your ears, pulling primarily with your arms instead of initiating the movement with your back, and performing reps too quickly without control. All of these mistakes reduce the effectiveness of the exercise and open the door to strain and injury.
A Step-by-Step Guide to Perfect Form
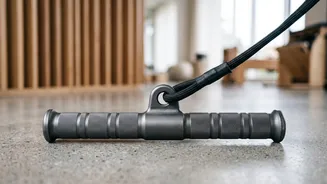
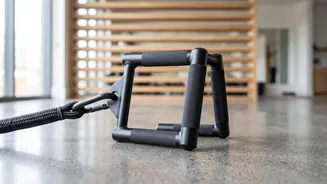
To get the most out of your seated rows, focus on a slow, controlled movement. Start with a lighter weight than you think you need. Sit tall on the bench with your feet firmly on the footplates and a slight bend in your knees. Grasp the handle with your arms fully extended, your chest up, and your shoulders pulled back and down. Before you even bend your elbows, initiate the movement by pulling your shoulder blades together, as if you're trying to pinch a pencil between them. Then, drive your elbows back, keeping them close to your body, and pull the handle toward your lower torso. Pause for a second at the peak of the contraction, squeezing your back muscles. Slowly return the handle to the starting position over two to three seconds, allowing your shoulder blades to stretch forward but without letting your lower back round. This controlled negative portion of the rep is just as important as the pull itself.
When Is It Time to Add More Weight?
Progressive overload is key to getting stronger, but it must be done intelligently. The rule of thumb is to prioritise perfect form before increasing the load. A good benchmark is to only add weight once you can comfortably complete all of your planned sets and reps with impeccable technique. For example, if your goal is 3 sets of 10–12 repetitions, you should only increase the weight after you can successfully perform 12 clean reps on all three sets for two consecutive workouts. When you do increase the weight, do it in small increments, such as by 2.5 to 5 kg. Your rep count will likely drop back down to the lower end of your target range, and that's perfectly fine. The goal is to work your way back up to the top of the rep range with perfect form before adding more weight again. This methodical approach ensures you're building real strength, not just learning to cheat with heavier loads.