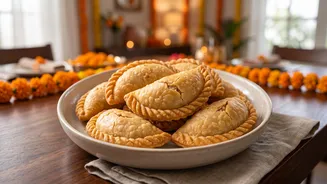






As Diwali approaches, the aroma of festive sweets fills the air. Among the most cherished is the Gujiya, a crescent-shaped pastry filled with sweet goodness. This guide will walk you through making perfect, crispy Gujiyas right in your own kitchen.
The Soul of the Sweet: The Filling
The
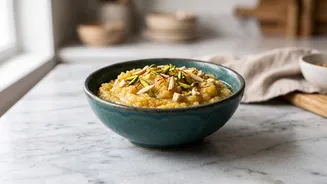
heart of a great Gujiya is its rich and aromatic filling. The traditional choice is a mixture centered around khoya (also known as mawa), which are dried evaporated milk solids. To begin, crumble about 250 grams of khoya and sauté it in a heavy-bottomed pan on low heat. Stir continuously for 8-10 minutes until it turns a light golden brown and releases a pleasant aroma. Transfer this to a bowl and let it cool completely. While it cools, lightly roast a quarter cup of semolina (suji) until fragrant, and toast a mix of your favourite nuts like almonds, cashews, and pistachios before coarsely chopping them. Once the khoya is at room temperature, combine it with the roasted suji, about a cup of powdered sugar, a half-cup of desiccated coconut, the chopped nuts, and a teaspoon of cardamom powder. Mix everything thoroughly. Your delicious filling is now ready. The key is to ensure this mixture is completely cool before you start filling the pastries.
The Perfect Outer Shell: Making the Dough
The signature crispness of a Gujiya comes from a well-made dough. The texture should be flaky and bubbly, not hard or chewy. The secret lies in getting the 'moyan' or 'moan'—the amount of fat added to the flour—just right. In a large mixing bowl, combine two cups of all-purpose flour (maida) with a generous pinch of salt. Add a quarter cup of melted ghee. Now, using your fingertips, rub the ghee into the flour until the mixture resembles breadcrumbs. To check if the moyan is correct, take a small amount of the flour mixture in your fist and press it; it should hold its shape. This step is crucial for a flaky crust. Once the fat is incorporated, begin adding cold water, a little at a time, to knead a firm and stiff dough. Do not make the dough soft. Cover it with a damp cloth and let it rest for at least 30 to 45 minutes. This resting period allows the gluten to relax, making the dough easier to roll.
Assembly Line: Shaping Your Gujiyas
With your dough rested and filling cooled, it is time to shape the Gujiyas. After the resting period, knead the dough for another minute until smooth. Divide it into small, equal-sized balls. Keep the dough balls covered to prevent them from drying out. Take one ball and roll it into a thin circle, about 4-5 inches in diameter. Try to keep the edges slightly thinner than the center. Place a spoonful of the prepared filling onto one half of the rolled circle, leaving the edges clear. Be careful not to overfill, as this can cause the Gujiya to break open while frying. Lightly apply water with your fingertip along the edges of the circle. This will act as a glue. Carefully fold the other half over the filling to create a semi-circle. Press the edges firmly to seal them. You can use a fork to press and create a pattern, or you can buy a Gujiya mould for a perfect shape every time. For a traditional touch, you can also hand-crimp the edges in a decorative pattern known as 'gothna'.
The Golden Touch: Frying to Perfection
This is the final and most crucial step. The temperature of the oil or ghee determines the final texture of your Gujiyas. Heat ghee or a neutral oil in a kadhai or deep pan over a low flame. The oil should not be very hot; it should be just warm enough. To test, drop a small piece of dough into the oil. It should sink to the bottom and then rise slowly with small bubbles. If it rises immediately, the oil is too hot. Gently slide a few Gujiyas into the pan, ensuring not to overcrowd it. Fry them on a consistent low to medium-low heat, turning them occasionally, until they are a beautiful, even golden brown on all sides. This slow frying process is what makes the shell crisp and flaky all the way through. It will take patience, around 12–15 minutes per batch. Once done, remove them with a slotted spoon and place them on a wire rack or paper towel to drain any excess oil.