


Plan Your Celestial Shoot
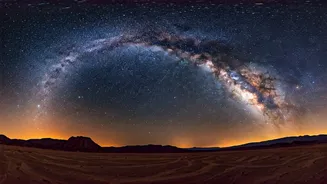
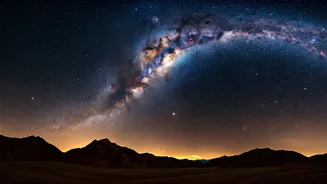
Success in astrophotography begins long before you touch your camera. The first step is timing. The Milky Way’s bright, dense galactic core is only visible in the Northern Hemisphere for part of the year. In India, your prime window is from late February
to October. During the early months, it rises in the pre-dawn hours, while by mid-year (June-August), it’s visible for most of the night. The second critical element is the moon. The headline’s “moonless super nights” refer to the period around the New Moon. A bright moon acts like a giant lightbulb in the sky, washing out the faint details of the galaxy. Use a moon phase calendar to plan your shoot for the few days before, during, and after the New Moon. Finally, check the weather forecast. Clouds are the enemy of any stargazer, so aim for a night with clear, transparent skies.
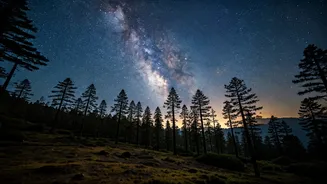
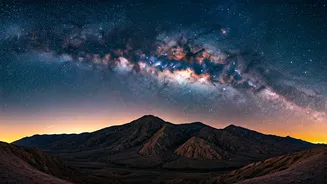
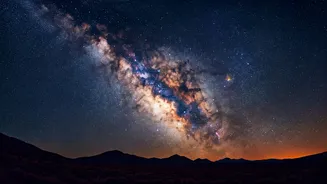
Escape the City Glow
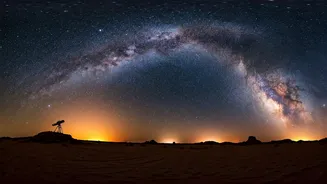
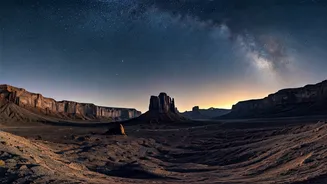
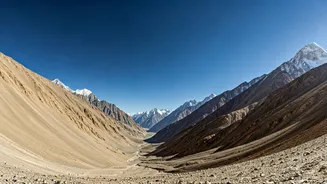
To see the galaxy, you must escape light pollution. The ambient glow from cities, towns, and even small villages can obscure the night sky. Astronomers use the Bortle Scale (from Class 1, an excellent dark sky, to Class 9, an inner-city sky) to measure this. For a decent shot of the Milky Way, you need to be in at least a Class 4 location, but Class 1-3 is ideal. In India, this means travelling to remote areas. High-altitude deserts like Ladakh and Spiti Valley are world-famous for their pristine skies. Other locations include the Rann of Kutch in Gujarat, parts of the Western Ghats away from major towns, and remote regions in Uttarakhand and Himachal Pradesh. Use a light pollution map online to find a dark spot near you.
The Essential Gear
While some high-end smartphones can now take basic night sky shots, a dedicated camera will give you the control needed for a great image. Here’s what you need:
1. A DSLR or Mirrorless Camera with Manual Mode: You need full control over aperture, shutter speed, and ISO.
2. A Wide-Angle Lens with a 'Fast' Aperture: A wide lens (e.g., 14-24mm) lets you capture a large swath of the sky. A 'fast' aperture (like f/2.8, f/1.8, or lower) allows more light to hit the sensor, which is crucial for night photography.
3. A Sturdy Tripod: You will be using long shutter speeds, meaning the camera must remain perfectly still to avoid blur. A cheap, flimsy tripod will vibrate in the wind and ruin your shot. Invest in a solid one.
Dialing in the Magic Settings
This is where the magic happens. Mount your camera on the tripod and switch to Manual Mode (M). While every situation is different, here is a universal starting point for your settings:
* Aperture: Set it to the widest possible opening (the lowest f-number, e.g., f/2.8). This lets in the maximum amount of light.
* Shutter Speed: To avoid star trails caused by the Earth’s rotation, a good starting point is the '500 Rule'. Divide 500 by your lens's focal length (e.g., for a 20mm lens, 500 / 20 = 25 seconds). This is your maximum shutter speed. Start there and adjust.
* ISO: This controls the sensor's sensitivity to light. Start with an ISO between 1600 and 3200. Too low, and your image will be dark; too high, and it will be noisy or 'grainy'.
* Focus: Your camera's autofocus won't work in the dark. Switch your lens to manual focus. Use your camera's live view, zoom in on the brightest star you can find, and manually adjust the focus ring until the star is a tiny, sharp point of light.
Technique for a Perfect Shot
With your settings dialed in, it's time to shoot. First, make sure you are shooting in RAW format, not JPEG. RAW files capture far more data, which is essential for editing later. To avoid camera shake when you press the shutter button, use a 2-second timer or a remote shutter release. Take a test shot. It might be too bright or too dark. If it’s too dark, try increasing the ISO slightly or lengthening the shutter speed (but be careful of star trails). If it’s too bright, do the opposite. Review your shot, zoom in to check for sharpness, and adjust your focus if needed. Experimentation is key.
Bringing the Galaxy to Life
A RAW photo of the Milky Way straight out of the camera can look flat and underwhelming. The final, vibrant image you see online is a result of post-processing. This is not 'cheating'—it’s an essential part of the art form, similar to developing film in a darkroom. Using software like Adobe Lightroom or Snapseed, you can make simple adjustments to bring out the hidden details. Gently increase the contrast, whites, and clarity to make the galactic core 'pop'. Adjust the white balance to remove any colour cast from light pollution and fine-tune the exposure. Even a few basic tweaks can transform a dull image into a celestial masterpiece.